As you journey through the maze of eCommerce, you’ll frequently come across two prominent names: WordPress and Magento 2. While WordPress provides an unparalleled platform for content creation and management, Magento 2 stands tall as an eCommerce giant. The integration of these two can dramatically boost your eCommerce capabilities and your online presence.
In this blog post, we’ll discuss how to easily integrate these two platforms using Fishpig’s Magento WordPress Integration, a free and popular extension that seamlessly brings together the best features of both systems.
Understanding WordPress And Magento Integration
Integrating WordPress and Magento can enhance the functionality of e-commerce websites by providing better content management capabilities, and Fishpig Extension simplifies this process.
Benefits Of Integrating WordPress And Magento
Integrating WordPress and Magento can greatly enhance the functionality and user experience for e-commerce business owners, web developers/designers, digital marketers, technology enthusiasts, and small business owners/entrepreneurs. Some of the key benefits include:
- Streamlined content management: Manage both your blog content and your e-commerce store within a single platform, simplifying the process of maintaining and updating your online presence.
- Improved SEO: Combining the capabilities and features of WordPress with Magento’s robust SEO features can significantly boost your site’s search engine rankings and organic traffic.
- Unified design and branding: Maintain consistent branding across your entire website by integrating WordPress themes with Magento store designs.
- Enhanced user experience: Provide your customers with seamless navigation between your blog and online store, improving their overall shopping experience.
- Increased customer engagement: By combining informative blog content with an easy-to-use e-commerce platform, you can cultivate increased customer loyalty and drive higher conversion rates.
- Utilization of specialized plugins and extensions: Leverage the vast libraries of WordPress and Magento extensions to customize further and optimize your integrated website.
- Easier updates and maintenance: Having one integrated system means you only need to perform updates, backups, and general maintenance in a single location instead of managing two separate platforms.
- Cross-promotional opportunities: Integrate blog content directly into product pages or showcase products within relevant articles for better cross-promotion strategies that encourage additional sales.
- Scalability: As both WordPress and Magento are highly adaptable platforms, integrating them creates an even more scalable solution to grow alongside your online business with ease.
- Cost savings: By consolidating resources under one integrated framework, you save on both time on development costs associated with managing two separate systems independently.
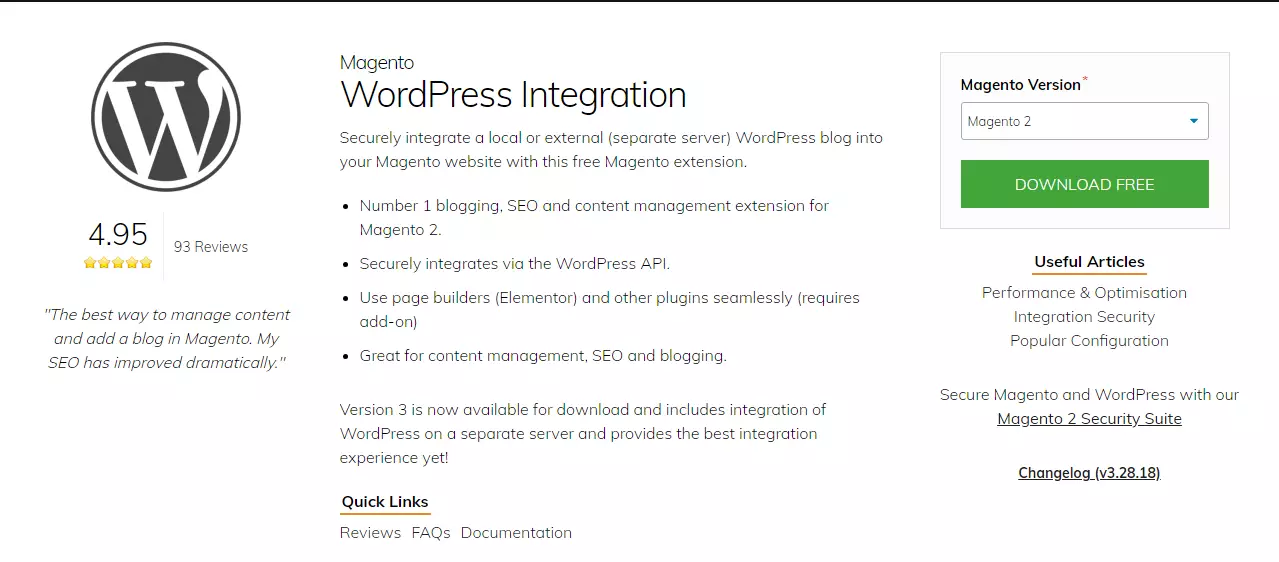
Fishpig Extension For WordPress And Magento Integration
The Fishpig extension provides a powerful solution for e-commerce business owners, web developers, and digital marketers looking to integrate WordPress with Magento seamlessly.
As a highly-rated, free Magento 2 module, it allows you to effortlessly merge your WordPress website and content management system into your Magento store.
By using the Fishpig extension for WordPress and Magento integration, businesses can unlock numerous benefits, such as improved search engine optimization (SEO) through shared content marketing efforts on their eCommerce store.
The tool is especially well-suited for small business owners who want to harness the power of blogging without compromising their online storefront’s performance or functionality.
Key Features Of Fishpig Extension For Magento
The Fishpig Extension for Magento offers a range of advanced features designed to integrate WordPress and Magento seamlessly. These key features include:
- Single sign-on capabilities: Customers can use the same login credentials for both Magento and WordPress.
- Unified theme integration: Maintaining consistent design across both platforms by connecting your Magento theme with your WordPress site.
- Automatic URL synchronization: Ensures that the URLs from both installations are compatible and eliminates any potential discrepancies or conflicts.
- Simple installation process: Easy-to-follow instructions facilitate smooth integration of the FishPig extension into your existing Magento store’s set-up.
- Support for WordPress shortcodes and page builders: Users can utilize popular WordPress tools within their Magento environment.
- Seamless compatibility with third-party plugins: Offers support for popular extensions such as Advanced Custom Fields (ACF) and WooCommerce — enabling further customization of your integrated site.
- Efficient content management: Streamlines managing blog posts, products, categories, and pages within the unified platform.
How To Integrate WordPress And Magento Using Fishpig
Prerequisites to WordPress Integration in Magento 2
Before we proceed, it’s essential to understand that working with Magento 2 and WordPress requires a certain degree of familiarity with both platforms. You’ll need to have Magento 2.x and WordPress 5.x installed and running perfectly.
Why these specific versions? The FishPig WordPress Integration module, a renowned tool for Magento WordPress integration, supports these versions for optimal compatibility and performance. You’ll also need some understanding of Magento’s frontend theme system to customize templates according to your needs.
Installing And Configuring WordPress
Before diving into the integration process, it’s essential to configure WordPress correctly to ensure seamless integration with your Magento store. Follow these steps to configure WordPress accordingly:
- Download WordPress: Download the latest version of WordPress from the official website.

- Install WordPress: Install the latest version of WordPress on your hosting server, preferably in a subdirectory called “WordPress” or “blog.”
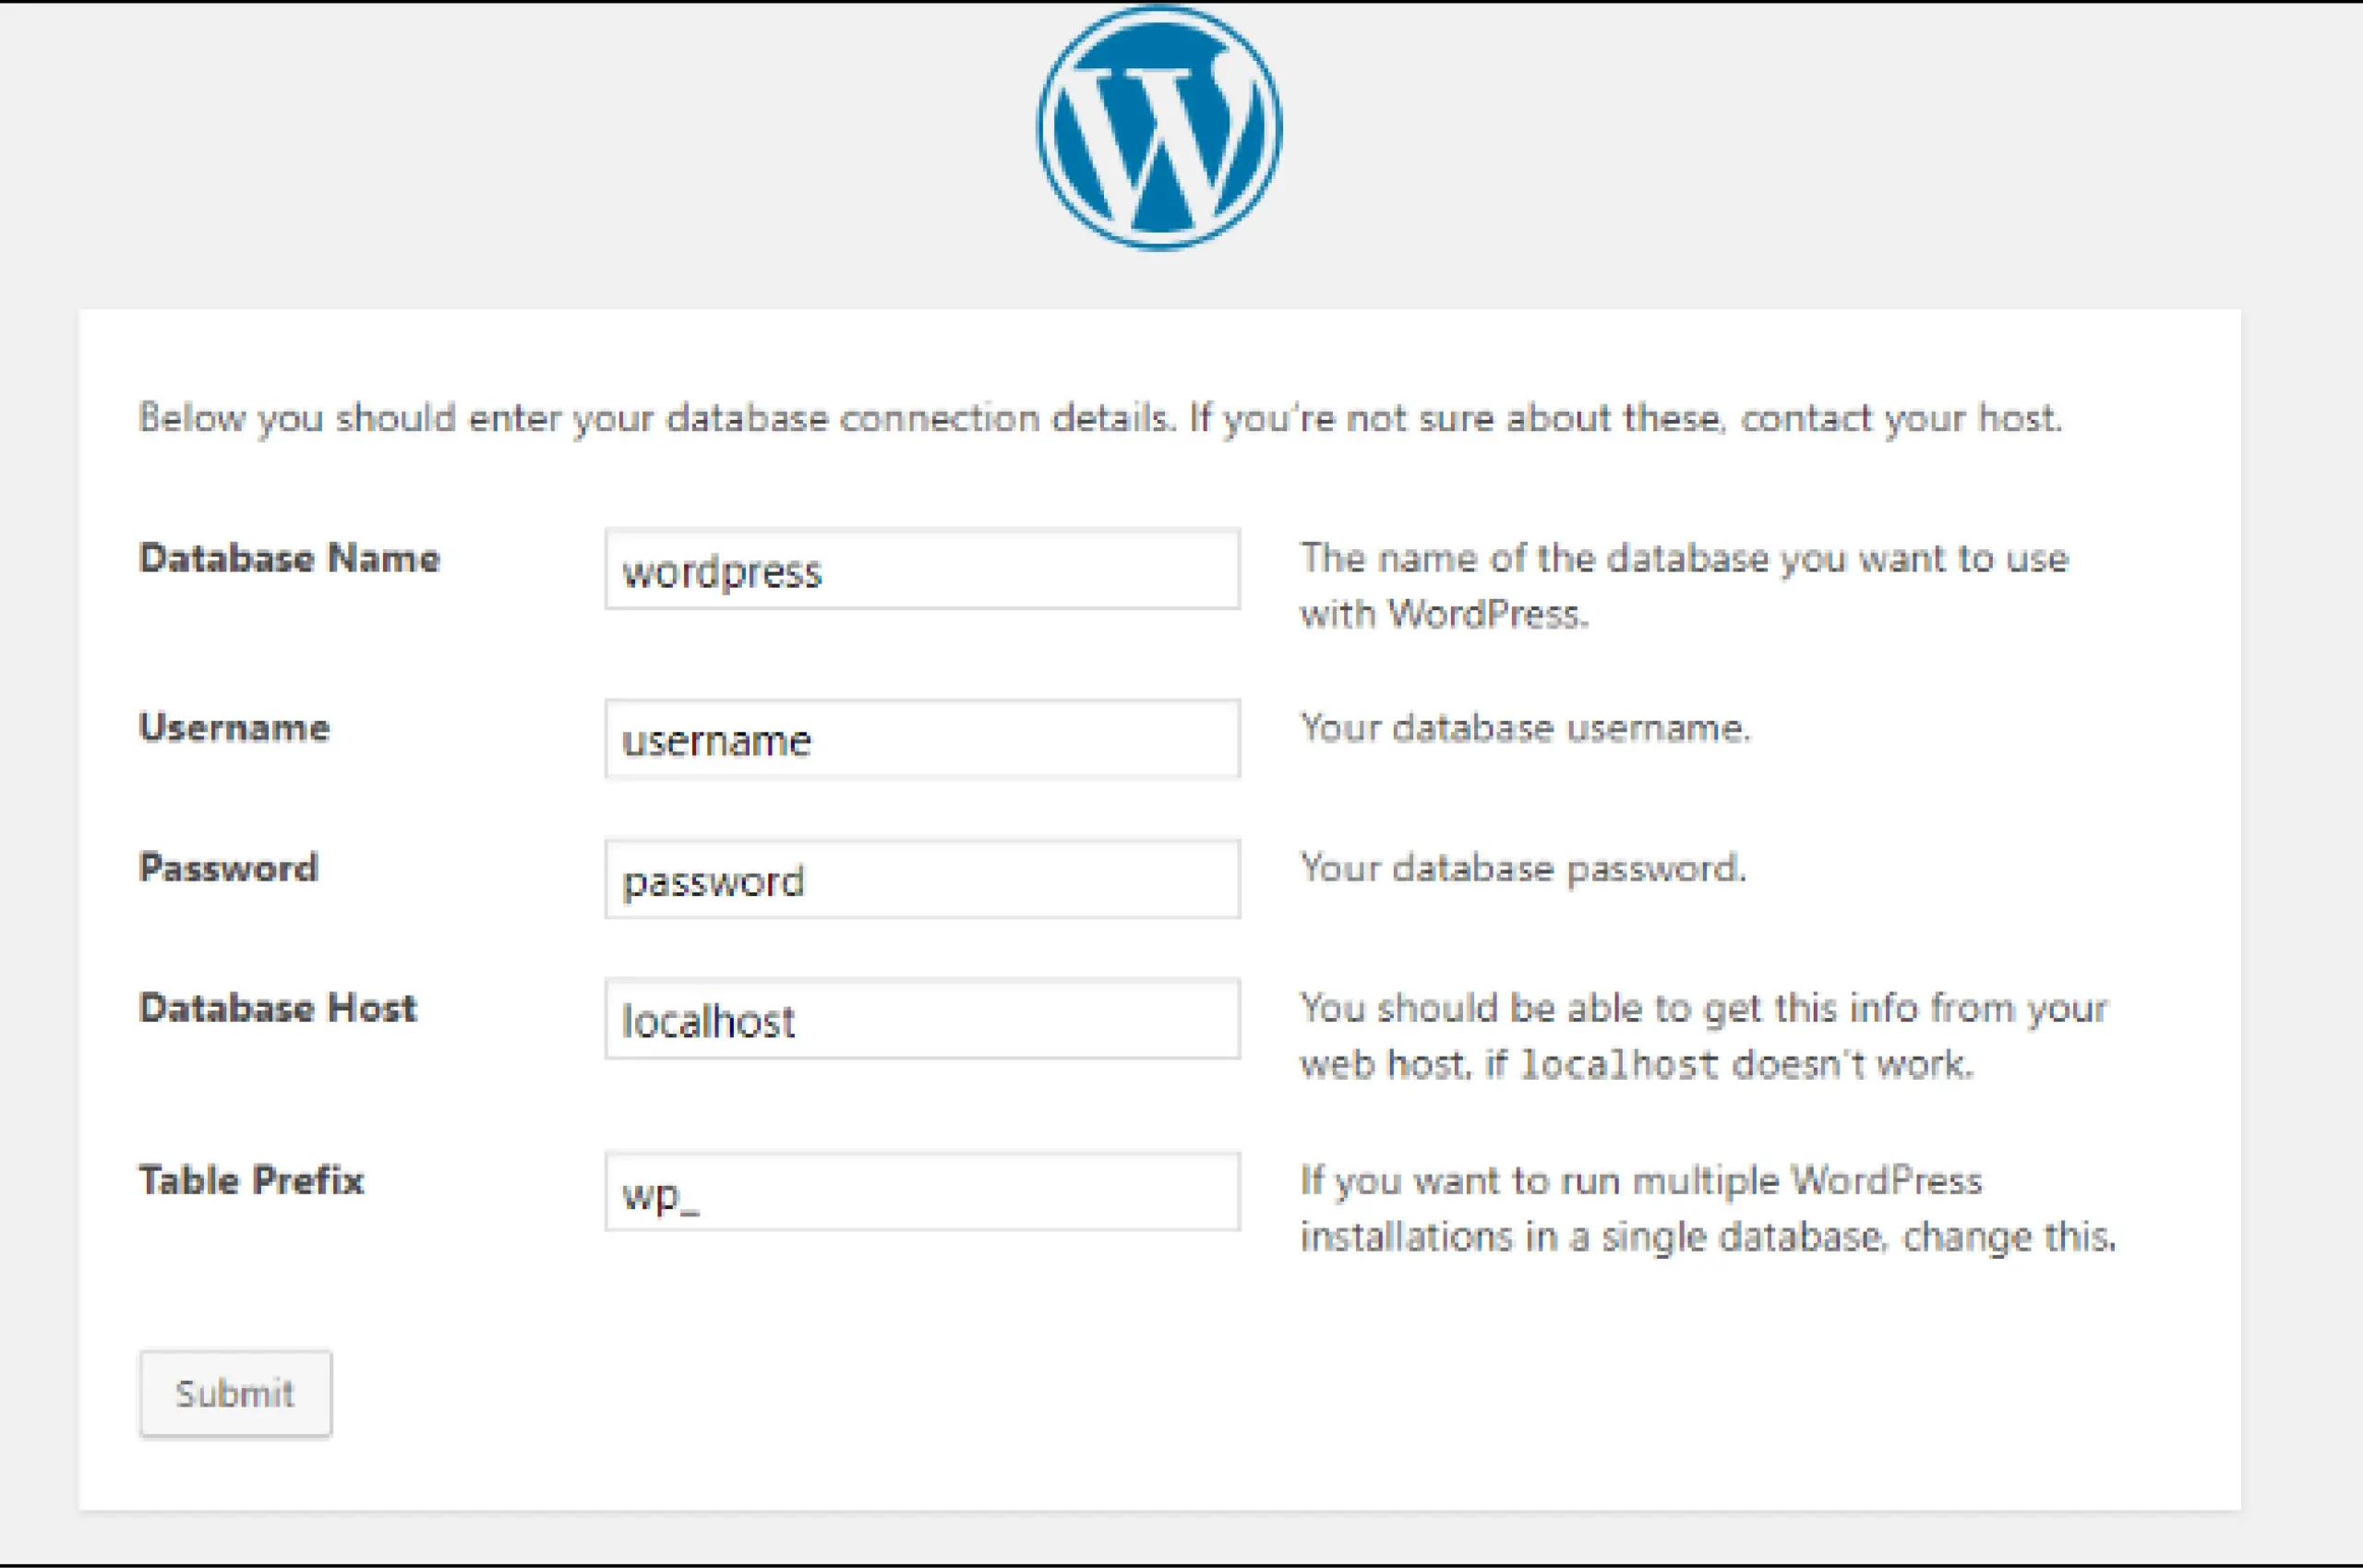
- Create a database: Set up a new database for WordPress on your server, making sure to note down the database name, username, and password.

- Run the WordPress installation: Navigate to your newly installed WordPress directory using a web browser and complete the installation process by following the setup instructions.
- Configure permalinks: In your WordPress admin panel, go to Settings > Permalinks and choose an SEO-friendly permalink structure like “Post name.”
- Update site address (URL): Under Settings > General, make sure “WordPress Address (URL)” is set to your Magento root URL followed by “/wordpress” or “/blog,” depending on what you named your subdirectory.
- Install key plugins: Before proceeding, install essential plugins such as Yoast SEO for search engine optimization and Advanced Custom Fields for customizing page content.
- Secure user accounts: Create strong passwords for all users in the system and assign appropriate roles based on their responsibilities.
- Disable comments (optional): To prevent spam, disable comments under Settings > Discussion if you do not wish to have them enabled on your blog posts.

Installing The Magento FishPig Extension (WordPress Integration Module)
Once you have Magento and WordPress ready, the next step is to install the FishPig WordPress Integration module. This module allows for both manual and Composer installations, giving you the flexibility to choose the method that suits you best.
Manual Installation
To begin the installation process of the Magento extension, follow these simple steps:
- Download the Magento WordPress Integration Module (FishPig extension) from the official website or Magento marketplace.

- Extract the contents of the zip file to a folder on your computer.
- Using an FTP client or file manager, navigate to your Magento root directory on your hosting server.
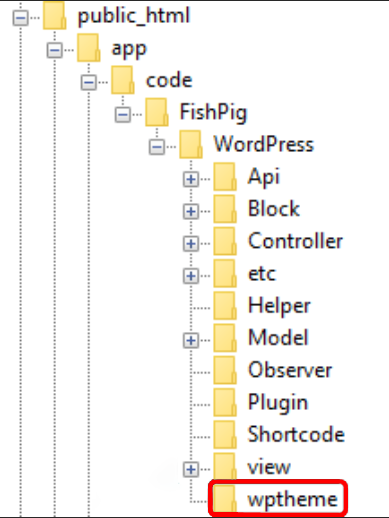
- Upload the extracted files into the “app” folder located in your store’s root directory:
app/code/FishPig/WordPress
- Run the following commands:
php bin/magento module:enable FishPig_WordPress
php bin/magento setup:upgrade
Installation Using Composer:
To install the module using Composer in your Magento 2 root directory, execute the following commands:
composer require fishpig/magento2-wordpress-integration:^3.28.7
php bin/magento module:enable FishPig_WordPress
php bin/magento setup:upgrade
Configuring the Magento WordPress Integration Module
Once you’ve installed the integration module, it’s time to set up the basic configuration. You’ll need to configure the settings in both Magento and WordPress platforms.
Magento Settings:
Navigate to Stores > Configuration > FishPig > WordPress in your Magento 2 Admin. Here, you can adjust the settings for URL, Login, Blog Route, Custom Post Types, and more.
WordPress Settings:
For WordPress, visit the Settings > Permalinks page and select ‘Post name’ for your permalink structure.
Database Configuration
Now, we need to connect your Magento 2 store to the WordPress database. You can access your WordPress database details via your WordPress wp-config.php file. You’ll need the database name, username, password, and host.
In the Magento Admin, navigate to Stores > Configuration > FishPig > WordPress > Database and enter these details.
Path Settings
The next step is configuring the path settings. You’ll need to set the WordPress Installation Path, which is the server path to your WordPress installation. It can usually be found in your WordPress wp-config.php file, right after the line:
define(‘ABSPATH’, dirname(__FILE__) . ‘/’);
Magento will try to detect this path automatically, but if it doesn’t, you can manually enter it in Stores > Configuration > FishPig > WordPress > Path.
Once you’ve completed these steps, verify that the integration works correctly by accessing both Magento and WordPress admin panels. Note that additional extensions, such as FishPig’s Attribute Splash Pages or Advanced Custom Fields, may be required for advanced features when integrating WordPress with Magento.
After installing the necessary extensions and configuring them per your needs, you are all set to harness the power of both platforms for optimum search engine optimization, better content management, and enhanced user experience for your e-commerce store.
WordPress Theme Installation
When integrating WordPress with Magento using FishPig, it’s important to understand that WordPress runs in a headless mode. This means that the WordPress theme isn’t used to display the blog; instead, Magento handles this. However, the FishPig module provides a WordPress theme that aids integration. The method of updating this theme varies depending on whether you’re using local or external integration mode.
WordPress Theme Installation in Local Mode
When a theme update is detected in local mode, the module will attempt to update the theme automatically. This process is silent, meaning you won’t be notified when it happens. However, if an error occurs and you need to build and install the theme manually, you can do so using the following commands:
Build theme and print path to theme ZIP to screen:
bin/magento fishpig:wordpress:build-theme
Build theme and install ZIP to –install-path:
bin/magento fishpig:wordpress:build-theme --install-path=pub/wp
WordPress Theme Installation in External Mode
In external mode, WordPress is installed on a separate server, making it impossible to install the theme automatically. Instead, you can run the following command to generate a ZIP file containing the latest version of the theme:
bin/magento fishpig:wordpress:build-theme
This command will display the path to the latest theme build on the screen.
You can then install this theme in WordPress via the WP Admin > Appearance > Themes > Add New > Upload Theme.
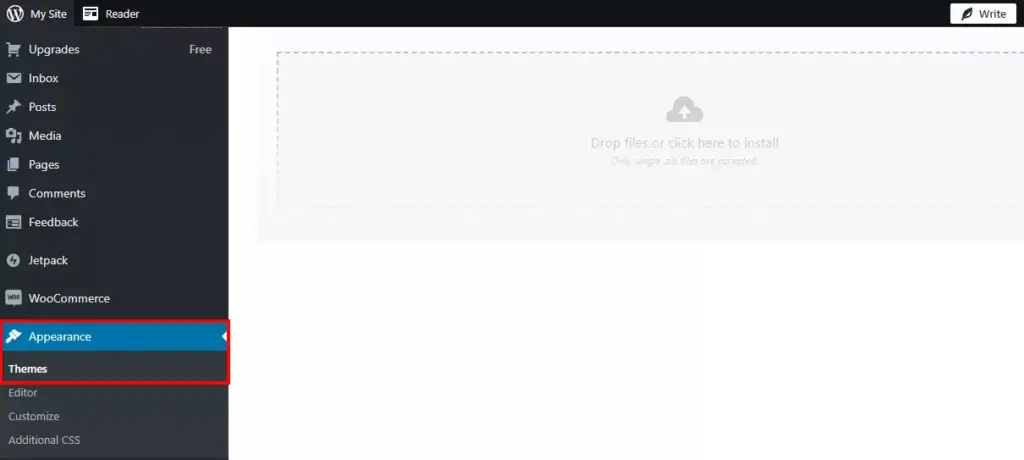
If you’re prompted about overwriting an existing theme, confirm to install the latest version on top of the existing one.
Customization
Template Customisation
When WordPress integrates into Magento, the WordPress theme doesn’t dictate the frontend display of the blog — that’s Magento’s job. The module comes with basic templates that display your blog data. These are rudimentary templates, but they’re straightforward to customize to achieve any design you need.
Here are the template paths, depending on your installation method:
- For manual installation:
app/code/FishPig/WordPress/view/frontend/templates - For Composer installation:
vendor/fishpig/magento2-wordpress-integration/view/frontend/templates
When editing these templates, don’t alter the file directly. Instead, copy the file to your custom theme, maintaining the path. This practice prevents you from losing changes when updating the module.
Layout XML
Layout XML files are a crucial part of Magento’s frontend theme system, as they build pages based on individual blocks. They’re mighty tools that allow for significant changes with minimal code, provided you understand them.
The module uses many different layout handles, some static, others dynamic, based on the content. The more popular layout handles are listed below, but for a complete list, use the code:
print_r($block->getLayout()->getUpdate()->getHandles());
exit;
Note that it requires some technical knowledge about Magento templates and XML syntax, so it may be helpful to consult with a professional developer for more advanced customization needs.
Changing the Page Layout
The module uses a 2columns-left layout by default, but this can be easily changed to 1column, 2columns-right, 3columns, empty, or any custom page layout you have set up. To change the page layout, you need to create a custom layout XML file.
Changing Block Templates (.phtml Files)
You can modify the template of any block in Magento by finding the layout name used. The key templates you might want to change for WordPress Integration are the post list templates and single post view.
Code Examples
The WordPress integration module is constructed in adherence to Magento 2 standards, so it relies on blocks, models, and controllers for data display and manipulation. This ensures a seamless experience for those already acquainted with Magento products, as the blog posts and terms follow the same system.
Some general code examples can come in handy, particularly for creating custom post lists and menus.
Custom post list example:
$postCollection = $this->_objectManager->create('FishPig\WordPress\Model\ResourceModel\Post\Collection');
$postCollection->addIsViewableFilter()->setOrderByPostDate();
Menu example:
<block class="FishPig\WordPress\Block\Menu" name="wordpress_menu" template="menu.phtml">
 <arguments>
 <argument name="menu_id" xsi:type="string">main-menu</argument>
 </arguments>
</block>
Common Issues
Integrating WordPress and Magento through Fishpig can sometimes present certain challenges. Here are some common issues that users may face and how to troubleshoot them:
- Incompatibilities between WordPress plugins and Magento extensions can cause conflicts during the integration process.
- Issues with URL mapping can lead to broken links between the two platforms.
- Problems with user synchronization may occur, leading to access issues or incorrect account information on either platform.
- Design inconsistencies may arise if the WordPress blog does not use the same design elements as the rest of the Magento site or if there is a mismatch in stylesheets or templates.
- Site speed could be compromised if data-intensive operations like cart functionality were added through this integration method, as this would involve retrieving data from 2 different databases rather than one, which could slow down your site significantly.
General Troubleshooting Tips
If you encounter any issues while integrating WordPress and Magento through Fishpig, here are some general troubleshooting tips that may help:
- Make sure you have installed the Fishpig extension correctly and configured it according to the instructions.
- Check your WordPress installation page and verify that the WordPress table prefix matches the one specified in your Magento configuration.
- Double-check that your WP_CONFIG.php file contains the correct credentials for your WordPress database, including the database name, username, and password.
- Verify that both Magento and WordPress are hosted on the same server or have access to each other’s hosting server.
- If you are experiencing problems with cart functionality after integration, ensure that all third-party plugins installed on either platform are compatible with one another.
- Check if there were any updates to your Magento or WordPress installation recently that could conflict with their integration through Fishpig.
Security Considerations
To ensure the safety and protection of your website, it is essential to understand the external and local modes, caching, and optimization techniques.
External And Local Modes
One critical aspect to consider when integrating WordPress and Magento is the security of both platforms. External and Local Modes serve as two options for managing this.
External Mode
In External Mode, you install WordPress on a separate server that has no access to your Magento site, making it virtually impossible for any potential WordPress vulnerabilities to harm your Magento store’s security.
For additional security, limit external database connections on the WordPress server to the Magento server IP.
Local Mode
Local Mode involves installing both platforms on the same server, which can create some security risks since hackers can take advantage of vulnerable plugins or themes installed in one platform to gain access to the other.
If WordPress is installed in a subdirectory of Magento, a compromise of WordPress could potentially jeopardize Magento. To combat this increased risk, ensure you follow these steps:
- Always keep WordPress updated. This includes the WordPress core and plugins.
- Uninstall all themes except the FishPig theme.
- Only install plugins from reputable sources.
- Use separate databases with separate users and a custom table prefix.
- Delete core files you don’t need.
- Add further security by adding IP restriction to WordPress using a .htaccess file.
Caching And Optimisation
You’ll need to optimize website performance through caching to get the most out of your Magento and WordPress integration. This involves storing frequently accessed data in a cache folder to quickly retrieve it without putting too much strain on the server.
Clearing the cache folder regularly can help improve website performance by allowing the server to process requests faster and reducing bandwidth costs. Additionally, optimizing your Magento website for SEO can also enhance website performance and security.
Optimization Tips For WordPress And Magento Integration
To optimize the integration of WordPress and Magento, it is important to implement WordPress optimization strategies such as image compression and cache plugins, as well as Magento optimization techniques like enabling caching and optimizing server settings.
WordPress Optimisation Strategies
Optimizing WordPress is crucial for achieving better integration with Magento and improving your website’s overall performance. Here are some helpful strategies:
- Use a lightweight theme: Choose a theme optimized for speed to avoid slow loading times.
- Keep plugins to a minimum: Only install necessary plugins that won’t conflict or slow down your website.
- Optimize images: Large image files can slow down your website, so compress them before uploading.
- Enable caching: Caching saves visitors’ data in their browser, reducing load times when they revisit your site.
- Improve navigation: Make sure your navigation menu is user-friendly and easy to navigate for improved user experience.
- Use shortcodes: Shortcodes can help you display information from your Magento store on your WordPress site quickly.
- Implement AMP pages: Accelerated Mobile Pages optimize content for mobile users, leading to faster loading times and improved search engine rankings.
Magento Optimisation Techniques
To improve the performance and speed of your Magento WordPress Integration site, there are several optimization techniques you can use. Here are some essential Magento optimization techniques that will help you enhance your eCommerce website’s performance:
- Minimize Page Load Time: Use built-in caching features in Magento, optimize images and videos, and reduce the number of HTTP requests.
- Optimize MySQL Database: Optimize your Magento database by reducing the size of tables, removing unused databases, and optimizing queries.
- Compress Content: Compress CSS and JavaScript files to reduce their sizes and boost download speed.
- Enable Flat Catalog: This technique simplifies product management by reducing the database size and speeding up catalog browsing.
- Minimize Extensions: Only install critical extensions that contribute to the overall functionality of your site.
- Enable Full Page Cache: With full-page caching enabled, users can load pages faster as it stores frequently accessed data in memory.
Tools and Extensions for Optimising Magento 2 and WordPress – A Look at FishPig’s Solutions
FishPig offers several tools that are specially designed to optimize Magento 2 and WordPress. Here are a couple of their noteworthy solutions:
- FishPig’s Magento 2 Page Speed Extension: This extension provides asset minification, image optimization (webp), and other performance-enhancing features that can significantly improve site speed.
- FishPig’s Magento 2 Full Page Cache Module: An alternative to Magento’s native FPC and Varnish, this module can reduce time to first byte (TTFB) to less than 0.5 seconds, providing faster page load times.
General Optimisation Tips
To ensure that your WordPress and Magento integration runs smoothly and efficiently, here are some general optimization tips:
- Regularly update both platforms to the latest version to ensure compatibility with each other and enhanced security.
- Use clean coding practices and avoid using too many third-party plugins or extensions that may slow down your website’s loading time.
- Optimize your images by compressing them and naming them appropriately for search engine optimization (SEO).
- Utilize caching techniques to reduce server load and speed up page loading times.
- Enable Gzip compression for faster file downloads.
- Reduce HTTP requests by combining CSS and JavaScript files when possible.
- Minimize the use of external scripts, as they can affect site performance.
- Monitor site speed regularly using tools such as Google PageSpeed Insights or Pingdom to identify areas that need improvement.
- Implement a content delivery network (CDN) to improve website performance by delivering content from servers closer to the user.
Best Practices For Optimizing WordPress And Magento Integration
To ensure seamless integration between WordPress and Magento, it’s important to implement the following practices:
Updating Site URLs To Ensure Seamless Integration
Updating site URLs is an essential step to ensure seamless integration between WordPress and Magento platforms. When integrating the two systems, it’s important to make sure that the URLs of both sites match.
For example, if you have a page on your Magento store with the URL “https://magentostore.com/about-us,” then you would want to create a page on your WordPress blog with the same URL structure, such as “https://magentostore.com/blog/about-us.” Updating site URLs in this way will help search engines understand how your pages are related and improve SEO for both platforms.
By updating site URLs correctly during integration, you can avoid issues like broken links or duplicate content. It’s worth noting that this process may require some technical knowledge, so don’t hesitate to seek assistance from a professional developer if needed.
Managing Blog Content Through the Magento Platform
One of the benefits of integrating WordPress and Magento through Fishpig is that you can manage your blog content directly from the Magento platform.
With this integration, you can create new blog posts, edit existing ones, and even schedule them to be published at a later date – all within the Magento admin panel.
Plus, since everything is managed through one central location, it’s easier to keep track of which products are being promoted with certain blog posts or vice versa.
Utilizing Common Design Elements For Consistency
Maintaining consistency in branding and design is crucial for building brand recognition and trust with customers. When integrating WordPress and Magento through Fishpig, it’s important to ensure that your website’s design elements are consistent between the two platforms.
To achieve this level of consistency, you can use a common theme for both platforms or customize them to match each other. For example, if your main website uses a particular font style throughout its pages, make sure that font is also used in your blog posts.
Another way to maintain consistency is by using shared navigation menus so that users can easily navigate between pages on both platforms.
Cross-Promotion Strategies For Maximum Exposure
Cross-promotion is an effective way to increase exposure and bring traffic to both your WordPress blog and Magento website. Here are some cross-promotion strategies that you can employ:
- Include links to your Magento store in your WordPress blog posts
- Add links to your popular WordPress blog articles on your Magento product pages
- Promote your WordPress blog on social media platforms like Facebook, Twitter, and Instagram
- Use email marketing campaigns to highlight your latest blog posts or new products on Magento
- Offer exclusive promotions or discounts for customers who engage with both platforms simultaneously.
Conclusion
The Magento 2 and WordPress integration is a powerful tool that brings together the best of eCommerce and content management. With the right setup, customization, and optimization, this integration can vastly improve your online business, giving your customers an unrivaled user experience.
Whether you’re new to Magento and WordPress or a seasoned user, we hope this guide helped illuminate the process of integrating these platforms.


How to Integrate WordPress and Magento 2: Magento WordPress Integration