Did you know that about 70 million new posts are published on WordPress monthly?
With such staggering numbers, it’s no surprise that WordPress remains the go-to platform for bloggers, businesses, and creatives worldwide. But, the world of WordPress can be overwhelming for newcomers, especially when creating the very first post. Adding posts helps establish your online presence and plays a pivotal role in SEO, brand loyalty, and audience engagement. But with the overload of content on the internet, how can you ensure your post stands out and serves its purpose effectively?
In this guide, we’ll learn how to add a new post in WordPress and make it stand out with expert tips and insights.
What are WordPress posts, and how are these different from WordPress pages?
WordPress offers both ‘Posts’ and ‘Pages’? While they might seem similar, they serve distinct purposes.
WordPress posts are individual pieces of content, typically associated with a date, and are displayed in reverse chronological order on your blog. They’re dynamic, meaning as you add new posts, the older ones get pushed down. Posts are ideal for regular updates, news, or articles.
Unlike posts, pages are static. They remain in one place and display the same content to every visitor. Examples include ‘About Us’, ‘Contact’, and ‘Services’ pages.
Understanding the WordPress Editors
WordPress offers multiple editors to craft your content. Each editor is designed to cater to different user preferences, ensuring a seamless content creation experience.
Block Editor vs. Classic Editor
WordPress has evolved over the years, and so have its editors. Initially, the platform offered the Classic Editor, a straightforward tool that many grew fond of. However, with the changing digital landscape and the need for more dynamic content, WordPress introduced the Block Editor.
Block Editor (Gutenberg)
The default WordPress editor, often referred to as Gutenberg editor, is a modern content editor introduced in WordPress 5.0. It uses blocks to add and format content, offering a more visual and intuitive approach.
Benefits
- Easily move and rearrange blocks.
- From text and images to embedded videos and widgets, the Block Editor supports a wide range of content.
- Customize each block with unique settings and styles.
Read How to Use Gutenberg Block Editor
Classic Editor
The Classic Editor is the traditional WordPress editor that many users started with. It offers a simple and linear approach to content creation.
Benefits
- Familiar interface for long-time WordPress users.
- Write and format content directly without the need for blocks.
Choosing the Right Editor
Your choice between the Block and Classic Editor depends on your comfort level and the type of content you wish to create. While the Block Editor offers more flexibility and customization, the Classic Editor is perfect for those who prefer a no-frills approach.
Switching Between Editors
If you ever wish to switch between the two editors, WordPress makes it easy. Simply navigate to your dashboard settings and select your preferred editor. Remember, switching editors won’t affect your previously published content.

Add a New Post in WordPress Website: Step-by-Step Guide
The process of adding new posts using WordPress is straightforward, but there are several elements to consider to ensure your content is optimized and engaging. Let’s explore the steps:
Access the Post Editor
Dashboard Navigation
When you log into your WordPress dashboard, you’ll find a sidebar on the left. Here, you can navigate to the ‘Posts’ section.
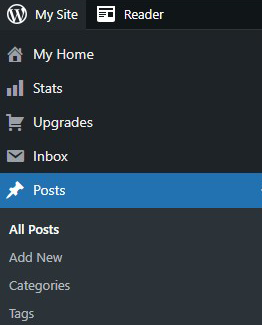
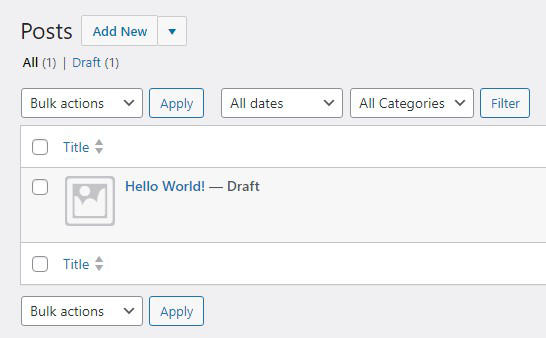
Clicking on it will take you to the Posts page, and clicking on ‘Add New’ will take you directly to the post editing screen.
Quick Access Options
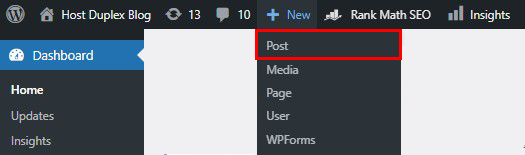
For those who are familiar with the WordPress interface, there’s a toolbar at the top of your dashboard. This toolbar provides a quick link to add a new post. Simply hover over the ‘+ New’ option and select ‘Post’ from the dropdown.
Craft the Perfect Post Title
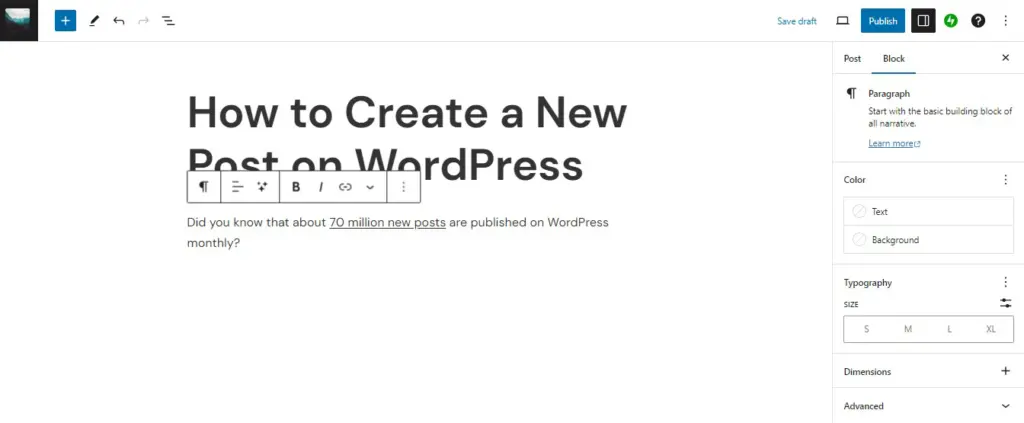
You will automatically see the title and content boxes when you enter the post-editing screen.
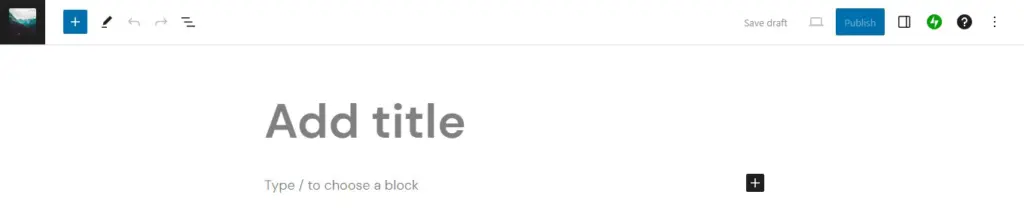
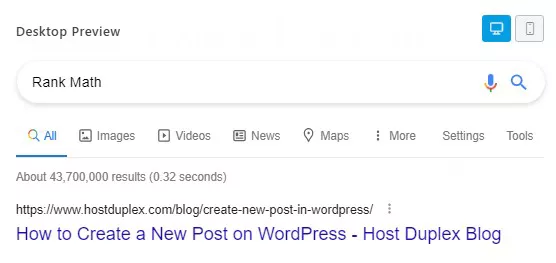
The title of your post is the first thing readers see, and it plays a crucial role in attracting their attention. A well-crafted title can make the difference between a post that gets clicked on and one that gets overlooked. Moreover, search engines like Google prioritize content with relevant and engaging titles, making it essential for SEO.
Tips for Creating an SEO-friendly Title
- Keep it Concise: Aim for a title length of 50-60 characters. This ensures that it displays correctly in search engine results without getting cut off.

- Use Relevant Keywords: Incorporate keywords that your target audience is likely to search for. This boosts the chances of your post appearing in search results.
- Make it Engaging: Pose a question, use power words (Best, Ultimate, Amazing, etc.), or create a sense of urgency to entice readers to click on your post.
Add and Format Content
Creating a post in WordPress is more than just typing words into a blank space. It’s about presenting your content in a way that’s engaging, readable, and visually appealing. Here is how you can add and format your content effectively.
Text, Headings, and Other Essential Blocks
Text Blocks
Every post starts with text. The paragraph block lets you add regular text, but with the power of Gutenberg, you can easily format it, change font sizes, and even add custom styles.
Also, read How to Use JetPack AI Assistant for content creation in WordPress block editor.
Headings
Headings are crucial for structuring your content. They not only help in breaking down your content but also play a vital role in SEO. Use the heading block to add H1, H2, H3, etc., to your post. Remember, the title of your post is typically H1, so start your content with H2 and go from there.
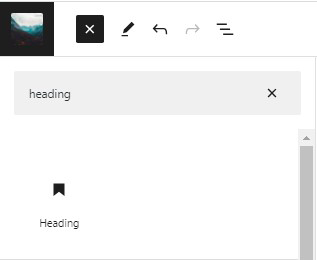
To add a heading in the Gutenberg editor of a post, you can do the following:
- Open the post or page you want to edit in the Gutenberg block editor.
- Click on the plus symbol on the top left of your editor.
- A dropdown menu will appear where you can search for the header block.
- The block is automatically placed in your editor when selected.

You can also change the type of heading by using the quick editor toolbar directly above your heading, where you’ll see options for H2, H3, and H4.
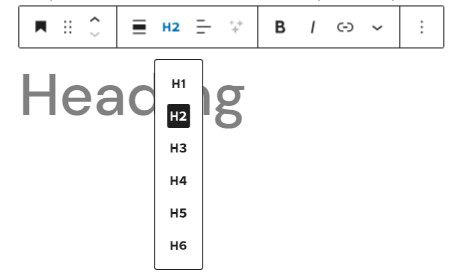
Note that it is not recommended to use an H1 tag inside of your content as it is typically reserved for the page title, which is already being displayed on the page dynamically by themes.
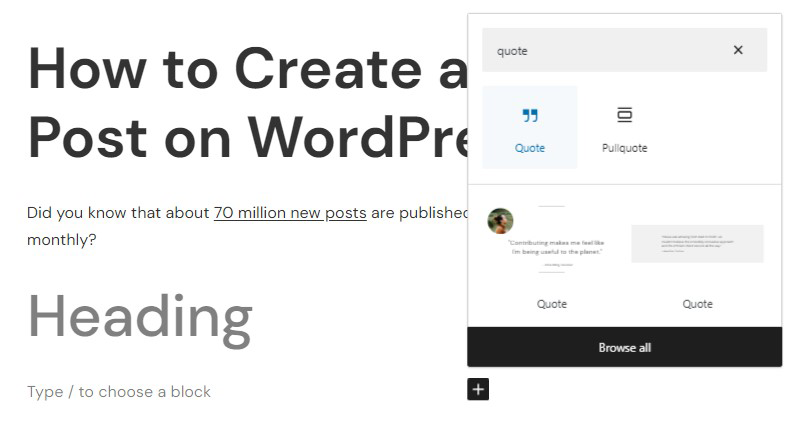
Lists, Quotes, and More
Want to add a bulleted or numbered list? There’s a block for that. Want to highlight a quote from an expert? Use the quote block. The variety of blocks available ensures that you can present your content in the best way possible. Simply click on the + icon in the block editor and search for the desired block.
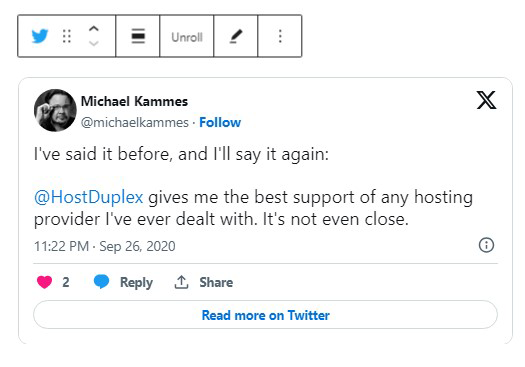
Embedding Third-Party Content
Sometimes, you might want to embed content from other platforms, like a tweet from Twitter or a video from YouTube. WordPress makes this easy with its embed blocks. Simply choose the platform from which you want to embed and paste the link, or you can search for the platform name and paste the link in the block, and WordPress takes care of the rest.
Enhancing Posts with Media
Visuals play a pivotal role in making your content engaging. A post with images, videos, and other media is more likely to retain the reader’s attention than one without.
Incorporating Images
Images break the monotony of text and provide a visual representation of what you’re discussing. They can explain, complement, or even enhance your content. Moreover, visuals can evoke emotions, making your post more relatable.
How to Add and Optimize Images
Adding images is a breeze with the image block. You can upload images from your computer, choose from your media library, or even search for free images from platforms like Pexels.
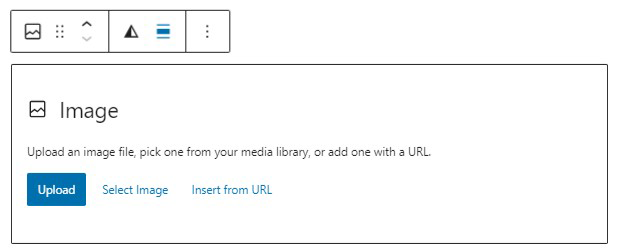
Once added, ensure you optimize them. Add alt text for SEO, choose the right size so they load faster, and align them appropriately within your content.
You might also want to read 8 Best WordPress Optimization Plugins.
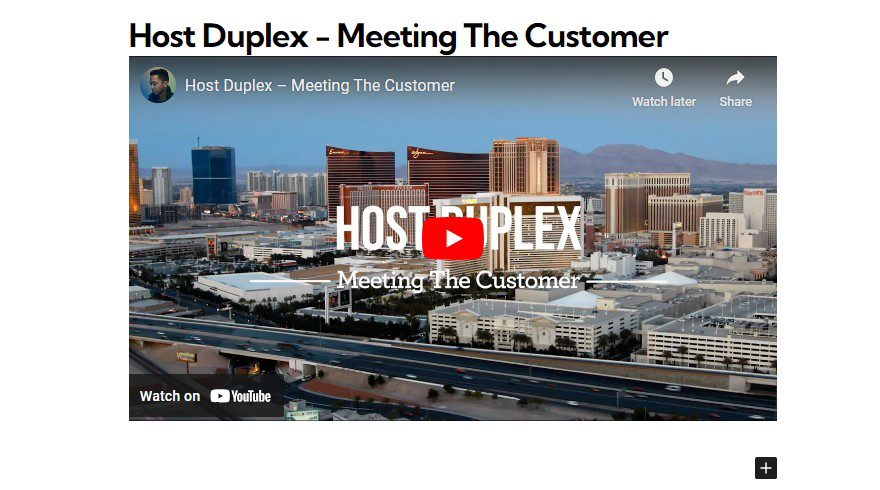
Embedding Videos and Other Media
Videos can explain concepts better than text in many cases. They’re engaging and interactive and can significantly increase the time a visitor spends on your post.
Embedding Methods
Just like with third-party content, WordPress offers specific blocks for embedding videos. Whether it’s a video from YouTube, Vimeo, or any other platform, simply choose the right block, paste the link, and you’re set.
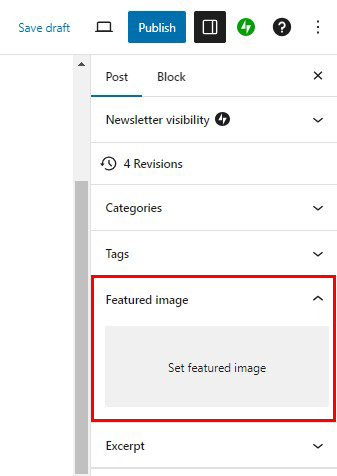
Setting the Featured Image or Post Thumbnails
Every blog post deserves a captivating visual representation. A featured image acts as the face of your post. It can attract readers, make your post shareable, and enhance the overall aesthetics of your blog page. It can also play a role in SEO. An optimized image with relevant alt text can improve your post’s visibility in image search results.
To set the feature image, navigate to the post-editing screen and select the settings icon located on the right side of the page. Scroll down in the “Post” tab until you reach the feature image section, then click on “Set feature image” to set the desired image.
Tips for Selecting and Optimizing the Right Image
- Ensure the image is relevant to the content of your post.
- Use high-resolution images, but be mindful of the file size. Large files can slow down your page loading speed.
- Use tools like TinyPNG or image-optimizing plugins like Smush or EWWW Image Optimizer.
- Consider using WebP images, which are smaller in size but maintain good quality.
- Always add ‘Alt Text’ for SEO and accessibility.
- Ensure you have the right to use the image. Consider using stock photos or creating custom graphics.
Organizing with Categories and Tags
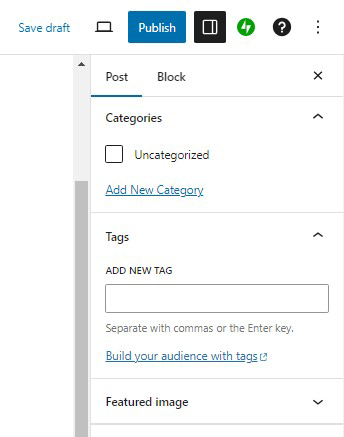
Organization is key to providing a seamless user experience. Categories and tags help in structuring your content, making it easier for readers to find related topics.
To set the categories and tags, navigate to the post-editing screen and select the settings icon located on the right side of the page. Scroll down in the “Post” tab until you reach the categories or tags section, then select the categories and add tags for your post.
Differences Between Categories and Tags
Categories
Think of them as the table of contents for your blog. They are hierarchical and can have sub-categories. For instance, a category could be “WordPress Tutorials,” and a sub-category might be “Beginner Guides.”
Tags
These are like the index of a book. They are not hierarchical and are more specific. For a post about adding a new post in WordPress, tags might include “WordPress Editor,” “Block Editor,” and “Classic Editor.”
Best Practices for Effective Organization
- Be Consistent: If you’ve started categorizing posts, ensure every post is categorized.
- Limit Categories: Don’t overwhelm your readers with too many categories. It’s better to have a few broad categories and use tags for specifics.
- Descriptive Names: Use clear and descriptive names for categories and tags to improve SEO and user experience.
- Avoid Over Tagging: While adding multiple tags is tempting, limiting them to those most relevant to the post’s content is best.
Perfecting the Post URL Slug
Every piece of content you publish online has a unique address, known as a URL. This address is what users type into their browsers to access your content. In the world of WordPress, these URLs are known as permalinks.
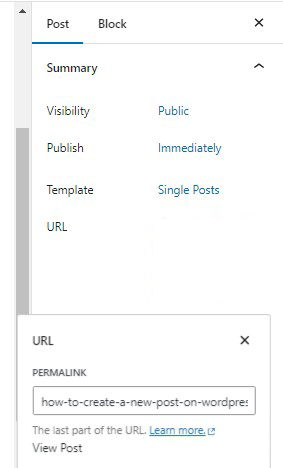
To add or edit a slug or permalink in the Gutenberg block editor in WordPress, do the following:
- Open the post or page you want to edit in the Gutenberg block editor.
- Click on the Post/Page tab in the right sidebar.
- You will be able to see a Permalink option where you can change the URL slug.
- Click on the Permalink section, and it will show an input that mainly allows you to change the URL slug.
Why SEO-friendly URLs Matter
The structure of your permalink can influence how search engines rank your content. SEO-friendly URLs are clear, concise, and descriptive, making it easier for search engines to understand the context of your content. Moreover, readers are more likely to click on URLs that seem relevant and trustworthy.
Customizing the Post Slug
The post slug is the part of the URL that is specific to that post. For instance, in the URL “example.com/how-to-bake-a-cake,” “how-to-bake-a-cake” is the post slug. WordPress allows you to customize this slug, ensuring it’s concise and contains your focus keyword. This not only aids in SEO but also ensures your readers know what to expect when they click on your link.
Crafting a Compelling Excerpt
An excerpt is a brief summary of your post. It’s the teaser that readers see before deciding whether to click on your article or not. Therefore, it’s crucial to make it as compelling as possible.
A well-crafted excerpt can significantly boost your post’s click-through rate. It gives readers a sneak peek into your content, enticing them to read more. Moreover, search engines sometimes use excerpts as meta descriptions in search results, making them crucial for SEO.
To add an excerpt to your post, navigate to the post-editing screen and select the settings icon located on the right side of the page. Scroll down in the “Post” tab until you reach the Excerpt section, then click on the arrow to expand it. Enter your desired excerpt into the provided field.
Tips for Writing an Effective Excerpt
- Keep it Short: Aim for about 20-30 words. It should be concise yet informative.
- Include Keywords: Ensure your focus keyword appears in the excerpt, but avoid keyword stuffing.
- Make it Engaging: Pose a question, share a surprising fact, or use powerful adjectives to grab attention.
Assigning Authors
If you run a multi-author blog, it’s essential to assign posts to the correct authors. Not only does this give credit where it’s due, but it also helps in building individual author profiles and credibility.
Importance of Authorship for Multi-Author Sites
- Credibility: Readers like to know who’s behind the content they’re consuming. Recognizing authors can build trust.
- Expertise: Certain authors might be experts in specific fields. Associating them with relevant topics can boost the post’s authority.
- Accountability: In case of updates or corrections, knowing the author can streamline the process.
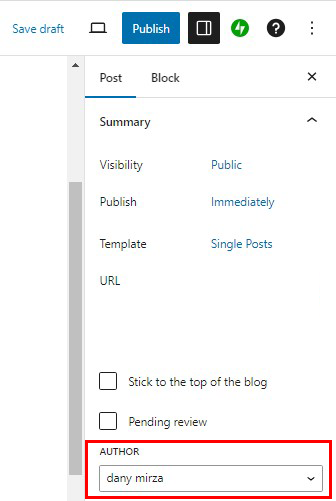
How to Assign and Manage Authors
In WordPress, you can easily assign authors from the post editor. If the desired author isn’t listed, you might need to add them as a user to your WordPress site. Remember to assign appropriate roles (like ‘Author’ or ‘Editor’) based on their contribution level.
Finalizing and Publishing Your Post
Before you hit that “Publish” button, there are a few crucial steps to ensure your WordPress post is ready for the world to see.
Previewing Your Post
Before you unleash your post to your audience, it’s always a good idea to see it through their eyes. Previewing allows you to catch any formatting issues, broken links, or other potential problems that might detract from the user experience.
To preview your post, click on the preview icon located on the upper right side of the post editing screen.
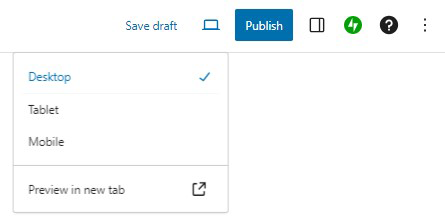
Responsiveness Check
With the variety of devices people use to browse the web, from desktops to tablets to smartphones, it’s crucial to ensure your post looks great on all of them. WordPress provides a feature to preview your post on different device screens. This ensures that no matter where your audience is reading from, they get a seamless experience.
Content Flow
While writing and editing, it’s easy to miss how the post will actually appear. Previewing gives you a chance to read the post as a continuous piece, helping you spot areas that might need more clarity or better transitions.
Post Visibility Options
Every piece of content might not be for everyone. WordPress offers flexibility in deciding who gets to see your posts.
- Public Posts: These are visible to everyone. It’s the standard setting for most blog posts, ensuring maximum reach.
- Private Posts: Want to share something with a select group? Private posts are only visible to site admins and editors. It’s perfect for content that’s not ready for the wider audience or is meant for internal use.
- Password-Protected Posts: This is a middle ground between public and private. Anyone with the password can view the post, making it ideal for content you want to share with a specific group without making them site admins or editors.
Post Comments Options
You can also enable or disable comments for individual posts by doing the following:
- On the right side of the post editing screen, navigate to Posts.
- Scroll down and find and open the Discussion tab in the settings sidebar on the right.
- By default, post comments are enabled, but you can change the settings as needed.

Scheduling Posts for Later
In the WordPress block editor, you can set the post to Publish immediately or schedule your WordPress posts to go live at a specific time. This feature is incredibly useful, especially if you want to maintain a consistent posting schedule but can’t always be online to hit the “publish” button.
Benefits of Post Scheduling
- Consistency: By scheduling posts, you can ensure that your content goes live at the same time, maintaining a consistent posting schedule.
- Flexibility: You can write multiple posts at once and schedule them to be published over several days or weeks.
- Time Zones: If your audience is spread across different time zones, you can schedule your posts to go live during peak hours in different regions.
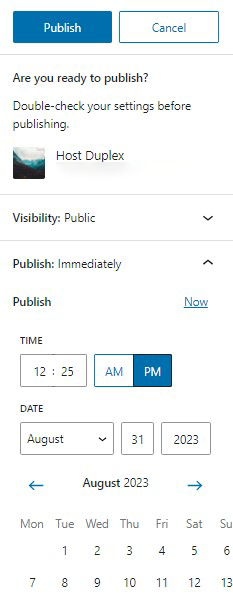
How to Set Up Automatic Publishing
- Draft Your Post: Write your post as you normally would.
- Access Post Settings: Click on “Publish” and look for the “Publish” section on the right sidebar.
- Choose a Date and Time: Click on “Immediately” next to “Publish” and select the date and time you want your post to go live.
- Confirm: Once you’ve chosen your desired date and time, click “Schedule” at the top of the page. Your post will now be set to go live automatically.
Sum Up
As we wrap up this comprehensive guide, let’s take a moment to reflect on what we’ve covered. Starting a new post in WordPress might have seemed daunting at first, but with the right tools and knowledge, it becomes a seamless process. We’ve learned to add a new post in WordPress, from understanding the intricacies of WordPress editors to mastering the art of crafting compelling titles, adding media, and even scheduling posts for future publication.
Remember, every WordPress post you create is an opportunity to connect with your audience, share your insights, and establish your online presence. Each article, story, or guide you publish adds value to your website and can significantly impact your SEO and overall digital footprint.
So, what are you waiting for? With this guide, you’re well-equipped to embark on your WordPress publishing journey.


How to Add a New Post in WordPress: Best Beginner’s Guide in 2023