WordPress, the world’s most popular content management system, has always been at the forefront of content creation. Previously, WordPress relied on the TinyMCE editor, which was a straightforward, linear content editor. Over the years, WordPress evolved, and the demand for more dynamic content grew. The introduction of the Gutenberg block editor in WordPress 5.0 back in 2018 marked a new era of adapting to the needs of its vast user base.
The Gutenberg editor, named after Johannes Gutenberg, the inventor of the printing press, was initially the project name for this editor. However, as it became an integral part of the core WordPress software, it’s now more commonly referred to as the “block editor.” Gone were the days of a single canvas; now, content could be created using individual blocks, each with its unique properties and settings.
In this guide, we’ll explore how to use Gutenberg Block Editor. From its basic functionalities to advanced techniques, this tutorial has got you covered.
What is the Gutenberg Block Editor?
Released in November 2018, WordPress 5.0 was a landmark update for the platform. The highlight of this release was the Gutenberg block editor, replacing the classic editor that users had grown accustomed to. This wasn’t just a new feature; it was a paradigm shift in content creation, emphasizing flexibility and user experience.
Gutenberg’s primary objective was to enhance the user experience, making content creation more intuitive and visually engaging. It achieves this by using a block-based approach. Every element, be it paragraphs, headings, lists, buttons, widgets, or columns, is represented as a block. This modular approach allows users to easily add, customize, and rearrange content elements.
The transition from Gutenberg to the WordPress block editor
While Gutenberg started as a project to revamp the WordPress editor, it has now become synonymous with the WordPress block editor. The essence of block-based editing lies in its simplicity and flexibility. Each block is an independent content element that can be customized, rearranged, or reused. This approach offers users a visual representation of their page, making the editor feel more like a page builder than its predecessor.
Full-site editing
Full-site editing is one of the groundbreaking features of Gutenberg. It allows users to design and customize their entire website using the block editor. From headers and footers to sidebars and content, every aspect of the site can be crafted using blocks. This feature introduces tools like the Site Editor, Template Editing Mode, and Block Themes, providing users with unparalleled control over their website’s design and functionality.
(We’ll discuss full site editing in detail later in this article.)
How Does the WordPress Gutenberg Editor Work?
At its core, Gutenberg is all about “blocks.” Think of blocks as individual units of content—be it a paragraph, an image, a video, or even a table. This modular approach allows you to craft content by adding, customizing, and rearranging these blocks, giving you a visual representation of your post or page.
Blocks are the fundamental elements in the Gutenberg editor. Whether you’re adding text, images, videos, or widgets, each piece of content is represented as a block. This system provides flexibility, allowing you to easily move, customize, or even reuse blocks across your posts and pages.
Comparison with traditional page builders
While traditional page builders relied on shortcodes and custom interfaces, Gutenberg’s block-based approach offers a more intuitive experience. It feels more like a modern page builder, where you can visually design your content, but it’s baked right into WordPress.
Advanced layout techniques with columns block
One of the standout features of Gutenberg is its ability to handle advanced layouts with ease. You can group blocks, organize content into columns, and even create intricate designs without relying on additional plugins or custom code.
Do You Need a Special Theme for Gutenberg?
There’s been a lot of buzz about Gutenberg’s compatibility with various WordPress themes. The good news is, Gutenberg has been designed to work seamlessly with most of the existing WordPress themes and plugins. However, there are some nuances to consider.
Compatibility of Gutenberg with various themes
Most modern WordPress themes are Gutenberg-ready, meaning they’ve been optimized to take full advantage of the block editor’s features. These themes ensure that blocks appear as intended, maintaining consistent styling and functionality across the site. If you’re using an older theme, it’s a good idea to check with the theme developer or look for updates that make it Gutenberg-compatible.
Block themes
Block themes are a newer concept introduced alongside Gutenberg’s full-site editing capabilities. These themes are built entirely using blocks, allowing users to customize every aspect of their website using the block editor. Block themes provide a more unified and integrated experience, ensuring that what you see in the editor is precisely what you get on the live site.
Classic Themes vs. Block Themes
| Feature/Aspect | Block Themes | Classic Themes |
| Foundation | Built for the block editor (Gutenberg) | Built primarily for the classic editor |
| Flexibility | Highly flexible with block patterns & full-site editing | Limited to theme options & customizer settings |
| Customization | Deep customization using blocks | Requires additional plugins or custom code |
| Learning Curve | Might be steeper for traditional WP users | Familiar for long-time WordPress users |
| Performance | Optimized for speed with fewer overheads | Performance varies; might need optimization |
| Integration with Editor | Seamless integration with Gutenberg | Might require updates or tweaks for Gutenberg |
| Template Editing | Full-site editing capability | Limited to theme templates |
| Code Base | Modern, often using JavaScript & React | Traditional PHP, CSS, and possibly JavaScript |
| Future | The direction WordPress is heading | Might become obsolete as Gutenberg evolves further |
Building Your First Post with Gutenberg WordPress Block Editor
1. Navigating to create a new post or page
Before you start crafting your masterpiece, you need to know how to access the Gutenberg editor:
- Log in to your WordPress Dashboard: This is usually accessed by appending /wp-admin to your website’s URL.

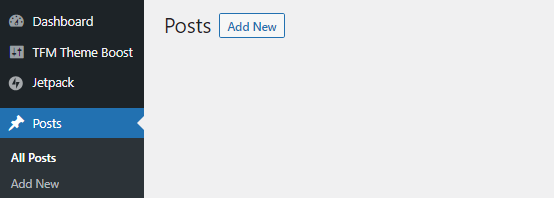
- Navigate to Posts: On the left-hand sidebar, click on ‘Posts’.

- Add New: Click on the ‘Add New’ button at the top. This will launch the WordPress Gutenberg block editor.
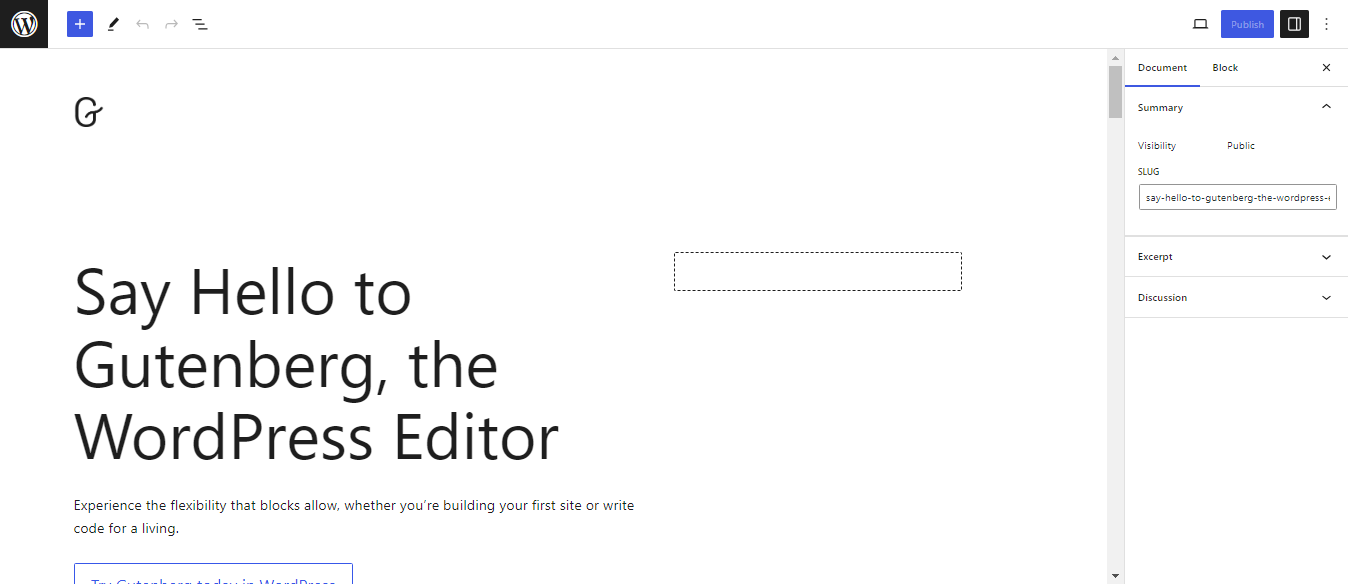
The Gutenberg editor might look different from what you’re used to, but it’s designed for efficiency. Here’s a breakdown:
- Editing Area: This is the main canvas where you’ll add and arrange your blocks. It’s a live preview, so you’ll see your post shaping up in real time.

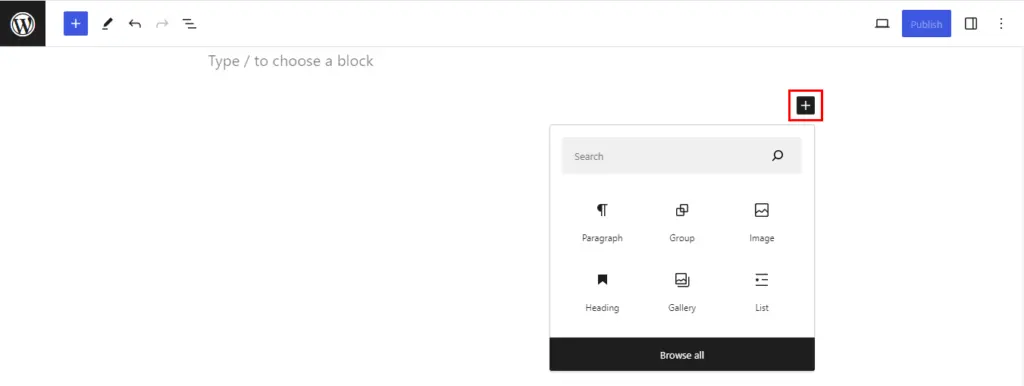
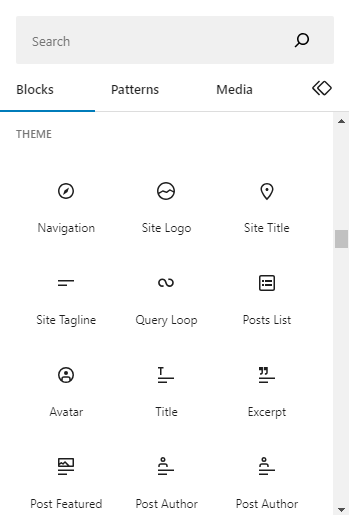
- Block Library: Clicking on the ‘+’ icon, usually at the top left, reveals the block library. Here, you can search for and add various blocks to your post. From basic text and images to more advanced layouts and widgets, the library has it all.

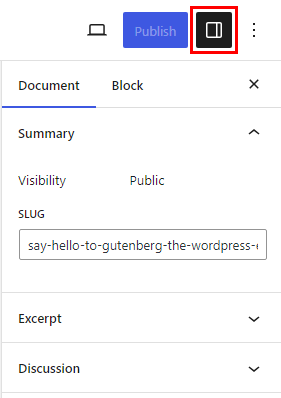
- Settings: On the upper right side, you’ll find the settings icon that opens the settings panel. This panel changes contextually, offering settings for the entire post or the specific block you’ve selected. Here, you can set post attributes, categories, tags, and more. When a block is selected, this panel lets you tweak its specific settings.


2. Working with Blocks
The Gutenberg Block Editor is all about blocks. These blocks are the building blocks (pun intended) of your content. Whether you’re adding text, images, videos, or more complex elements, everything is done through blocks. Let’s understand how to work with them effectively.
Adding Blocks to Your Post
To add a new block, click on the “+” button. This can be found on the top left corner, below an existing block, or to the right of a block. A menu will pop up, showcasing various block types. You can search for specific blocks or browse through categories.
Commonly Used Blocks
Some blocks you’ll find yourself using frequently include:
- Paragraph Block: The staple for adding text.
- Image Block: Add an image block and upload your desired image or select one from the media library.
- Heading Block: To add headings (H1, H2, H3, etc.).
- List Block: For bullet points or numbered lists.
- Quote Block: To highlight quotations.
- Links: Most text blocks have a link button in the toolbar. Use this to hyperlink text.
- Gallery: For showcasing multiple images, use the gallery block. Upload or select the images you want to display.
- Shortcodes: If you’re using plugins that provide shortcodes, you can add them to a paragraph block or use the dedicated shortcode block.
Organizing Blocks
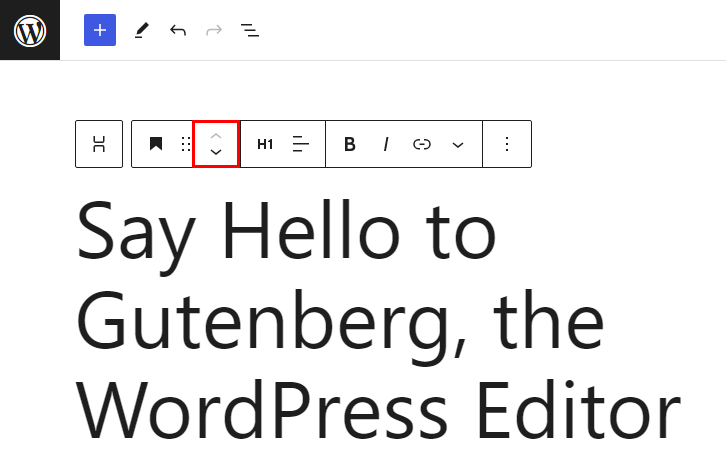
You can easily rearrange blocks by dragging them or using the up and down arrows from the quick access toolbar. For more complex layouts, group blocks or organize them into columns.
Quick Add
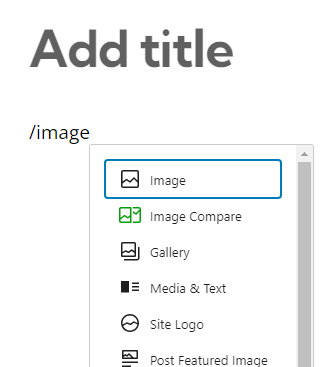
If you’re in the flow of writing and don’t want to interrupt yourself by searching for a block, you can use the quick add feature. Simply type / followed by the block’s name. For instance, /image will prompt the image block. This quick action can drastically reduce your content creation time.
3. Customizing and Formatting Blocks
Each block in Gutenberg comes with its unique settings, allowing you to customize it to your liking.
Adjusting Block Settings
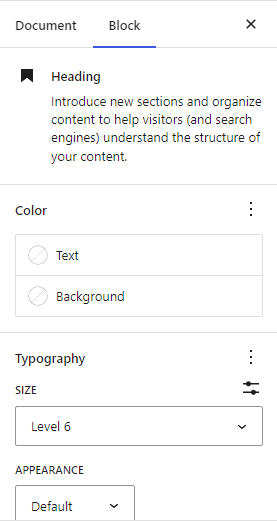
Once you’ve added a block, you’ll notice a new panel on the right side of your screen. This is the block settings panel. Here, you can adjust various attributes of the block, from its alignment to its color and more.
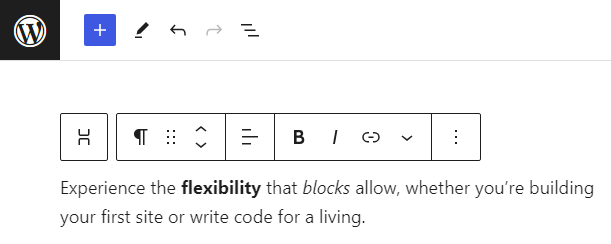
Styling and Alignment
Many blocks, especially text blocks, come with styling options. You can make your text bold, italic, add links, or even change its color. Additionally, alignment options let you position your block to the left, center, or right.
Advanced Settings
Some blocks come with advanced settings that let you add custom CSS classes, set block-specific permissions, and more. While beginners might not use these often, they’re invaluable for those looking to achieve a specific look or functionality.

Read our complete guide on How to Add a New Post in WordPress
Enhancing Your Content with Specialized Blocks
The Gutenberg Block Editor is not just about basic content blocks like paragraphs and images. It offers a plethora of specialized blocks designed to make your content stand out and cater to specific needs. Let’s explore some of these blocks and how they can help your content shine.
Embedding Multimedia
Video Block
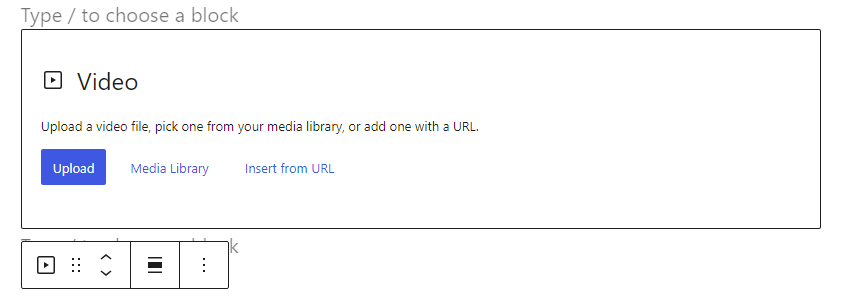
- Purpose: Allows you to embed videos directly into your posts or pages.
- How to Use: Simply add the block, paste the video URL (from platforms like YouTube, Vimeo, etc.), and Gutenberg will automatically embed it. You can also upload videos directly, but be mindful of file sizes and loading times.
Audio Block
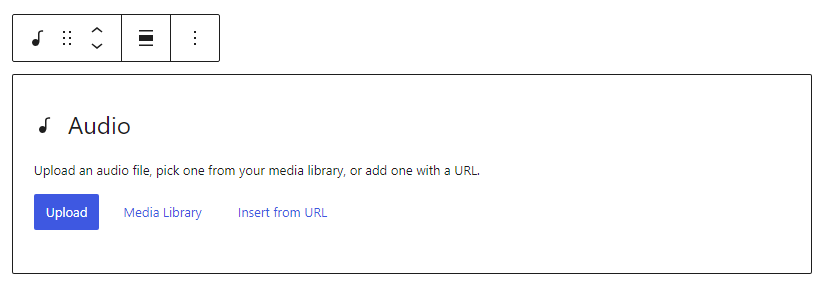
- Purpose: Ideal for embedding audio files, like podcasts or music tracks.
- How to Use: Add the block, upload your audio file, and it’s ready to play. You can also link to external audio sources.
Gallery Block
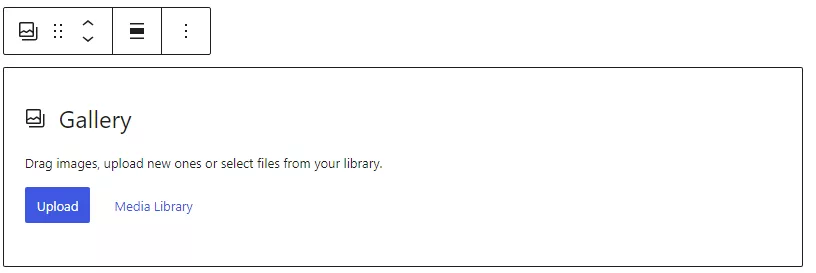
- Purpose: Display multiple images in a grid format.
- How to Use: Add the block, upload or select images from your media library, and arrange them as desired. You can also adjust the number of columns and image cropping.
Embed Blocks
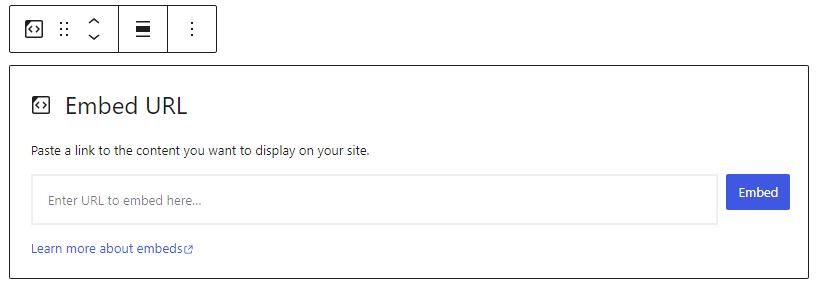
- Purpose: Integrating third-party content is simpler than ever. Gutenberg has dedicated blocks for the most popular services. Embed content from external platforms like Twitter, Instagram, Spotify, and more.
- How to Use: Choose the specific embed block for the platform you want (e.g., Twitter Embed), paste the URL, and Gutenberg will handle the rest.
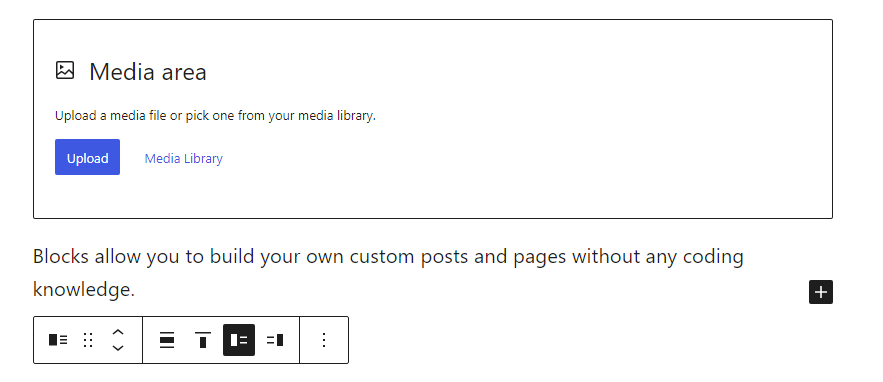
Media & Text block
One of the standout features is the Media & Text block. This allows you to place an image alongside text, perfect for creating visually appealing sections that combine visuals and content seamlessly.
Designing Layouts with Columns and Groups
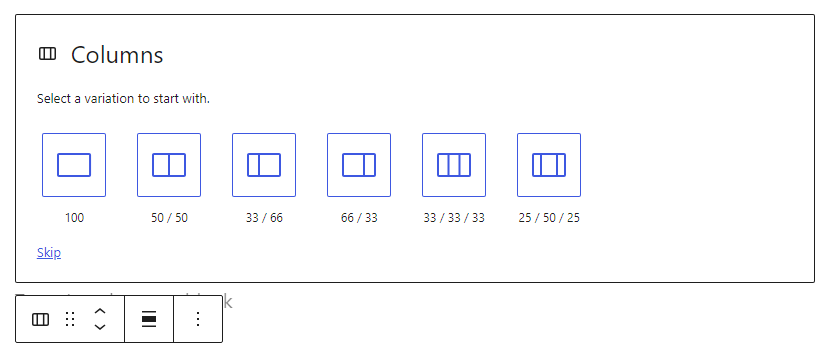
Columns Block
- Purpose: Create multi-column layouts for more intricate designs.
- How to Use: Add the block, select the number of columns, and start adding content to each column. You can adjust the column width and alignment for responsive designs.

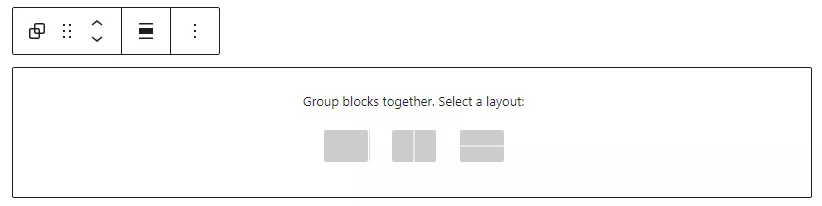
Group Block
- Purpose: Group multiple blocks together, allowing you to set shared attributes like background color or spacing.
- How to Use: Add the block, and start adding content inside. It acts as a container for other blocks, making it easier to move or style a group of blocks together.

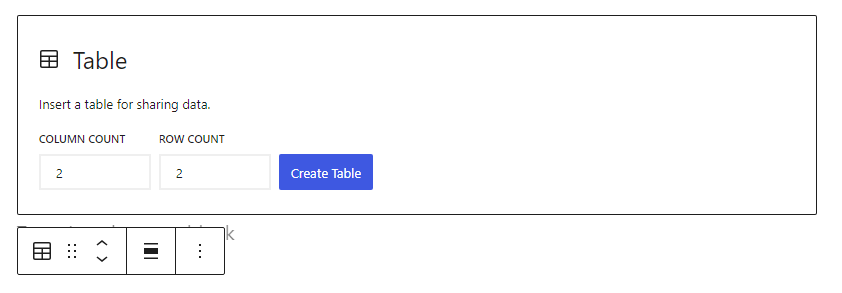
Creating tables inside articles
Gone are the days when you needed custom CSS or plugins to insert tables. With Gutenberg’s Table block, you can easily insert tables, choose the number of columns and rows, and input your data. It’s a straightforward way to organize and present information.
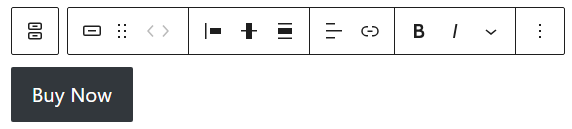
Adding buttons in posts and pages
Call-to-actions are crucial for engagement. With Gutenberg’s Button block, you can add stylish buttons to your content, linking them to other pages or external sites.
Advanced Block Techniques
Grouping and Organizing Blocks
Grouping Blocks
Why Group? Grouping allows you to combine multiple blocks into a single unit. This is especially useful when you want to apply a shared background color, spacing, or other design elements to a set of blocks.
How to Group?Simply select multiple blocks (by holding down the Shift key and clicking on each block) and then right-click to find the ‘Group’ option.
Arranging Blocks
- Drag and Drop: The easiest way to rearrange blocks is by using the drag-and-drop method. Hover over the block you want to move, click on the six-dot icon that appears, and drag the block to its new position.
- Up and Down Arrows: On the left side of each block, you’ll notice up and down arrows. These can be used to quickly move a block from one position up or down.
Creating Reusable Blocks
Why Use Reusable Blocks?
If you find yourself using the same content or layout across multiple posts or pages, reusable blocks can save you a lot of time.
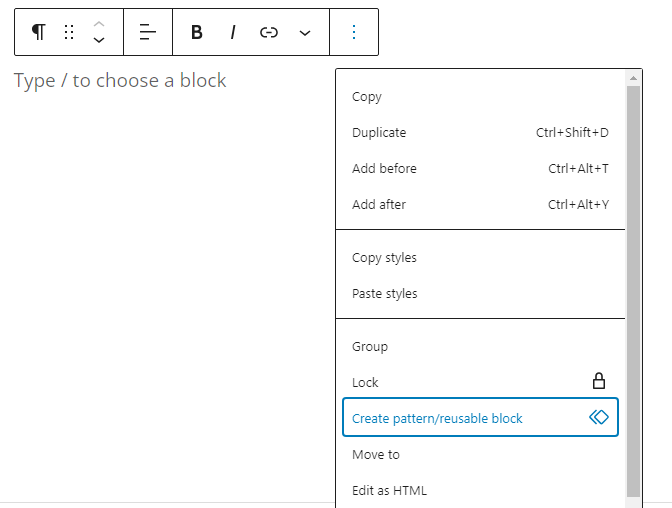
How to Create Reusable Blocks?
After setting up a block (or group of blocks) the way you want, click on the three-dot menu icon on the block toolbar and select ‘Add to Reusable Blocks’. Give it a name, and you’re set!
Managing Reusable Blocks
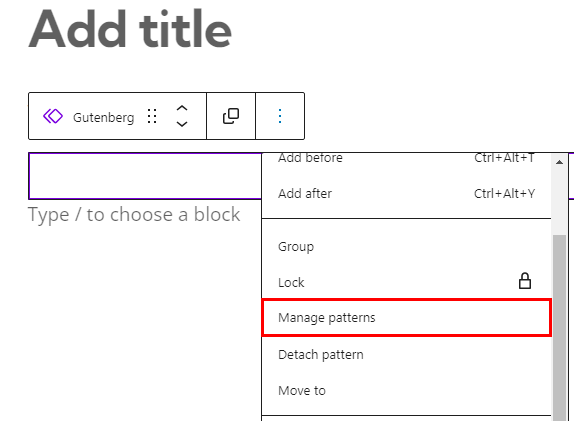
Accessing and Editing
To access all your reusable blocks, click on the ‘+’ icon to open the block library and then navigate to the ‘Reusable’ tab. Insert the reusable block, click on the three-dot menu icon, and select ‘Manage patterns’.From here, you can insert, edit, or delete reusable blocks.
Converting Back to Regular Blocks
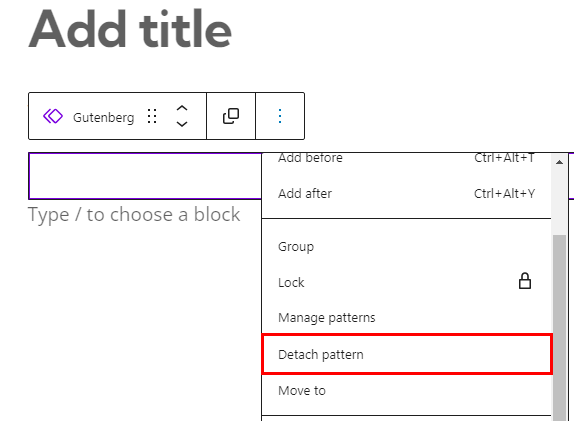
If you want to make changes to a reusable block without affecting other instances, you can detach it back to a regular block. Simply insert the reusable block, click on the three-dot menu icon, and select ‘detach patterns’.
Direct source code editing
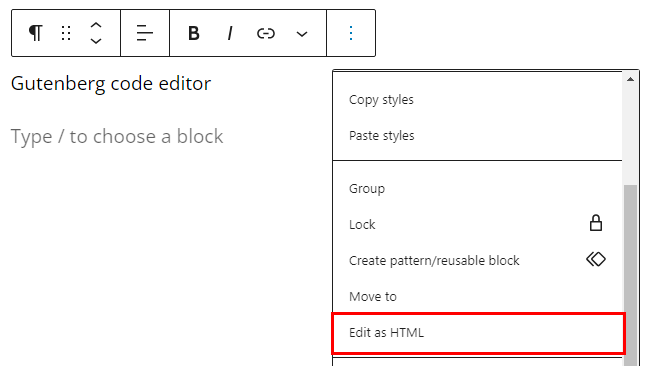
For those who are comfortable with HTML, Gutenberg provides an ‘Edit as HTML’ option. This allows you to see and edit the HTML of your blocks directly. It’s perfect for making precise adjustments or adding custom code snippets.
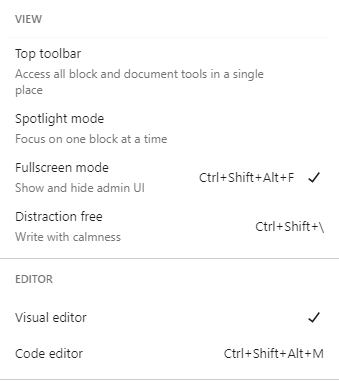
Full-screen mode, fixed toolbar, and spotlight mode
- Enhance your focus with the full-screen mode, eliminating distractions from the WordPress dashboard.
- The fixed toolbar option consolidates all block toolbars to the top of the editor, making tools easily accessible.
- If you find the editor interface too cluttered, you can enable Spotlight Mode. This mode highlights the block you’re currently editing and fades out the rest, allowing you to focus on one block at a time.
Tips for a Smooth Gutenberg Experience
The Gutenberg Block Editor, while powerful and flexible, can be a bit overwhelming for newcomers. But with a few tips and tricks up your sleeve, you can master it in no time. Here are some insights to ensure a smooth content creation experience:
Use the Search Function
With so many blocks available, the search function in the block library will be your best friend. Start typing the name of the block, and it’ll pop right up.

Use Keyboard Shortcuts
Gutenberg comes with a plethora of keyboard shortcuts to speed up your editing. For instance, pressing ‘/’ immediately after adding a new block lets you search for blocks right from the editing area. Some commonly used shortcuts are:
- Shift + Alt + H: Display the keyboard shortcut help.
- Ctrl + Shift + D: Duplicate the selected block(s).
- Ctrl + Alt + T: Insert a new block above the current block.
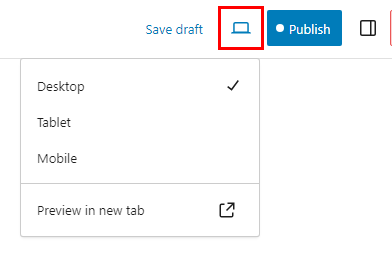
Preview Often
The ‘Preview’ button at the top lets you see how your post will look on the live site. It’s a good practice to preview your post frequently to ensure everything looks just right.
Use Block Navigation
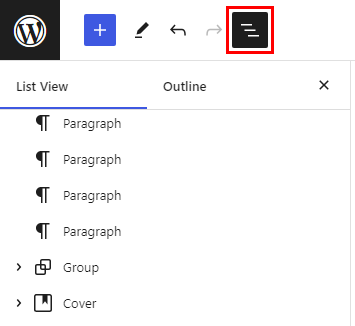
For posts with numerous blocks, navigating between them can be a chore. Use the Block Navigation tool (located at the top-left corner) to get an overview of all blocks in your post and jump to any block with a single click.
Make Reusable Blocks
As mentioned earlier, if you find yourself using the same layout or content across multiple posts, turn them into Reusable Blocks. This not only saves time but also ensures consistency across your content.
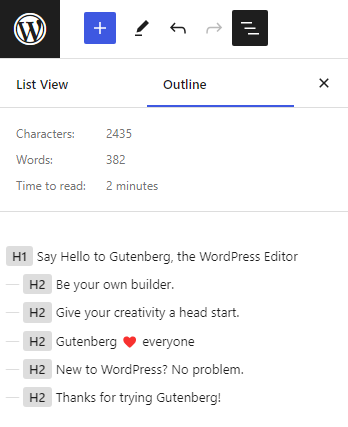
Overview Content Structure
Want a quick overview of your content’s structure? Click on the ‘Document Overview’ icon at the top-left corner and click on the outline tab. This tool provides a word count, heading count, and a document outline, helping you ensure a well-structured post.
Copy-Paste with Ease
Gutenberg handles copy-pasting gracefully. You can copy content from other editors or even Google Docs, and when pasted into Gutenberg, it will automatically convert them into appropriate blocks.
Use Block Patterns
Introduced in WordPress 5.5, Block Patterns are pre-designed sections (combinations of blocks) that you can insert into your posts. They allow you to insert complex layouts quickly and can be a real time-saver.
Handling Old Content in Gutenberg
Transitioning to Gutenberg might raise concerns about your existing content. But don’t fret; Gutenberg has been designed with backward compatibility in mind. Here’s what you need to know:
The transition of old content to the Classic block
When you open an older post or page in Gutenberg, it’s automatically placed inside a ‘Classic’ block. This block retains the familiar Classic Editor interface, ensuring that your content remains unchanged.
Options for editing old content
- Editing within the Classic Block: You can edit your old content right within the Classic Block, using the familiar Classic Editor tools.
- Converting to Gutenberg Blocks: If you wish to harness the power of Gutenberg for your old content, you can convert the Classic block into individual Gutenberg blocks. This allows you to redesign and reformat your old posts using the advanced features of the block editor.
Full-Site Editing with Gutenberg
The Gutenberg journey doesn’t stop at just editing posts and pages. With the introduction of Full-Site Editing (FSE), the horizon of what you can achieve with Gutenberg has expanded exponentially. Let’s explore this transformative feature:
What is Full Site Editor (FSE)?
As discussed earlier, Full-Site Editing is a revolutionary feature that allows users to edit the content and the entire website using Gutenberg blocks. This includes headers, footers, sidebars, and more. Essentially, it’s bringing the power of Gutenberg to the whole website, making WordPress more of a full-fledged website builder.
Template parts editing and theme blocks
With FSE, you can edit template parts directly. This means you can modify specific sections of your website, like the header or footer, without affecting other parts. Additionally, theme blocks allow you to insert specific elements of your theme, such as site title, post title, and post content, directly into your posts and pages.
The beauty of Full-Site Editing is that it provides a unified, block-based approach to building and customizing your entire website. Whether you’re tweaking the design of your homepage or updating the footer’s copyright information, everything is done through a consistent, user-friendly interface.
This feature is especially beneficial for those who might not have technical expertise. Instead of delving into theme files or understanding PHP, users can visually design and structure their websites. It’s a step towards democratizing website design, making it accessible for everyone.
However, as with any new feature, there’s a learning curve. It’s essential to familiarize yourself with the new interface, understand the available blocks, and practice to get the hang of it. But once you do, the possibilities with Full-Site Editing are endless.
Sum Up
The Gutenberg block editor has undeniably transformed the way we create content in WordPress. It’s not just a new editor; it’s a paradigm shift. From the modular approach of blocks to the enhanced flexibility in design, Gutenberg offers a modern content creation experience.
Gutenberg’s introduction was met with mixed reactions. Some embraced the change, while others were apprehensive. However, as time passed, it became evident that the block editor was here to stay. It addressed many of the limitations of the Classic Editor, offering a more intuitive interface and advanced design capabilities without the need for additional plugins.
One of the most significant advantages of Gutenberg is its empowerment of users. Even those without any design or coding experience can craft beautiful, media-rich content. The drag-and-drop functionality, the ability to easily embed content from platforms like YouTube and Twitter, and the introduction of reusable blocks have all contributed to a more efficient and enjoyable content creation process.
As with any technology, continuous improvement is the key. The WordPress community is actively working on refining and expanding the capabilities of the Gutenberg editor. With the introduction of Full Site Editing and more advanced blocks on the horizon, the future of content creation in WordPress looks promising.
Change can be challenging, but it often paves the way for innovation and growth. If you haven’t fully dived into Gutenberg yet, now is the time. Explore its features, experiment with different blocks, and discover the potential it holds. Remember, the best way to predict the future is to create it. And with Gutenberg, you have the tools to do just that.
FAQs
Is Gutenberg a Part of WordPress?
Absolutely! Gutenberg is now an integral part of the WordPress core. This innovative block editor replaced the classic TinyMCE editor, bringing a fresh and modern approach to content creation to the platform.
Can I still use the Classic Editor with WordPress?
Yes, while Gutenberg is the default editor for WordPress, users can still use the Classic Editor by installing the Classic Editor plugin. This allows users to switch between Gutenberg and the Classic Editor as needed.
Are my old posts and pages compatible with Gutenberg?
Absolutely! When you edit an old post or page in Gutenberg, it will be placed inside a Classic block, preserving its original formatting. From there, you can choose to convert it to individual Gutenberg blocks or leave it as is.
How do I add custom blocks to Gutenberg?
There are numerous plugins available that offer custom blocks for Gutenberg. By installing these plugins, you can extend the default set of blocks provided by Gutenberg and add specialized blocks tailored to your needs.
Is Gutenberg SEO-friendly?
Yes, Gutenberg is designed with SEO in mind. The block structure allows for clean and semantic HTML output, which is beneficial for SEO. Additionally, many SEO plugins are fully compatible with Gutenberg, ensuring that your content is optimized for search engines.
I’m facing issues with a specific block. What should I do?
First, ensure that your WordPress installation and plugins are updated. If the issue persists, seek help from WordPress experts or the support forum of the specific block or plugin causing the issue.
Can I use Gutenberg to create custom post types?
Yes, Gutenberg supports custom post types. Developers can register custom post types with Gutenberg support, allowing users to utilize the block editor for various content types beyond just posts and pages.


How to Use Gutenberg Block Editor: Best WordPress Block Editor Tutorial (2023)