The speed of your WordPress site can make or break your online presence. It’s not just about delivering information quickly; it’s about providing a seamless and enjoyable user experience.
Based on a Google study, if a mobile site takes longer to load, the likelihood of a visitor leaving increases by 123% as the load time goes up from one second to ten seconds. This means that if your website takes too long to load, you’re likely to lose potential customers before they even have a chance to engage with your content.
This article aims to guide you through the importance of website speed and the factors that influence it, and introduce you to the eight best WordPress speed test tools that can help you test the bottlenecks of your website’s performance, ensuring you deliver a seamless user experience and maximize conversions.
Why Should You Care About the Speed of Your WordPress Site?
Website speed significantly impacts user experience, search engine optimization (SEO), and ultimately, your site’s conversion rates.
Impact on User Experience
A slow-loading website can be a major turn-off for visitors. In a world where instant gratification is the norm, users expect web pages to load quickly. If your site fails to meet this expectation, visitors are likely to abandon it in favor of a faster one. This not only leads to lost potential customers but also damages your brand’s reputation.
Impact on SEO
Search engines like Google prioritize user experience, and website speed is a key component of that. A slow website can negatively impact your site’s SEO, resulting in lower rankings on search engine results pages (SERPs). This means less visibility for your site and a decrease in organic traffic.
Impact on Conversion Rates
Website speed directly affects your site’s conversion rates. As mentioned earlier, as page load time increases, the probability of conversion drops significantly. A fast-loading website, on the other hand, can keep visitors engaged, encouraging them to stay longer, explore more, and ultimately, convert.
What Factors Influence the Site Speed?
Several factors can influence your WordPress site’s speed. Some of the most common ones include:
Hosting
Your web hosting service plays a crucial role in your site’s speed. A good hosting provider like Host Duplex, with its high-performance infrastructure and advanced caching technology, can significantly enhance your site’s loading speed.

Themes and Plugins
The themes and plugins you use can also impact your site’s speed. While they can add functionality and aesthetic appeal to your site, they can also slow it down if they’re poorly coded or not optimized for speed.
Also read, Best WordPress Optimization Plugins
Images and Media
Large, unoptimized images and media files can significantly slow down your site. It’s important to optimize images and media files for the web to ensure they load quickly without compromising quality.
Code
Bloated and inefficient code can also slow down your site. Minifying your site’s code by removing unnecessary characters can help improve your site’s speed.
External Scripts
External scripts, such as ads, font loaders, etc., can significantly impact your site’s performance.
Content Delivery Network (CDN)
A CDN can speed up your site by storing copies of your site at various points around the world to ensure faster content delivery to users regardless of their location.
Caching
Implementing caching can make your website load faster by storing a version of your site on the visitor’s browser and serving it to them when they revisit your site.
How Can You Measure the Speed of Your WordPress Site?
Your website’s speed can be the difference between a user staying on your site or bouncing off to a competitor. But how can you measure the speed of your WordPress site? The answer lies in speed test tools. These tools are designed to analyze the performance of your WordPress website and provide actionable insights to improve your site’s speed. They measure various aspects of your website, such as load time, HTTP requests, and more, giving you a comprehensive view of your site’s performance.
What Are the Top WordPress Speed Test Tools?
There are numerous tools available to test your WordPress site speed, but not all are created equal. Some offer more detailed insights, while others are easier for beginners to use. Let’s dive into the most popular speed testing tools available:
- Google PageSpeed Insights
- GTmetrix
- Pingdom Tools
- WebPageTest.org
- YSlow
- New Relic
- UpTrends
- Yellow Lab Tools
Google PageSpeed Insights
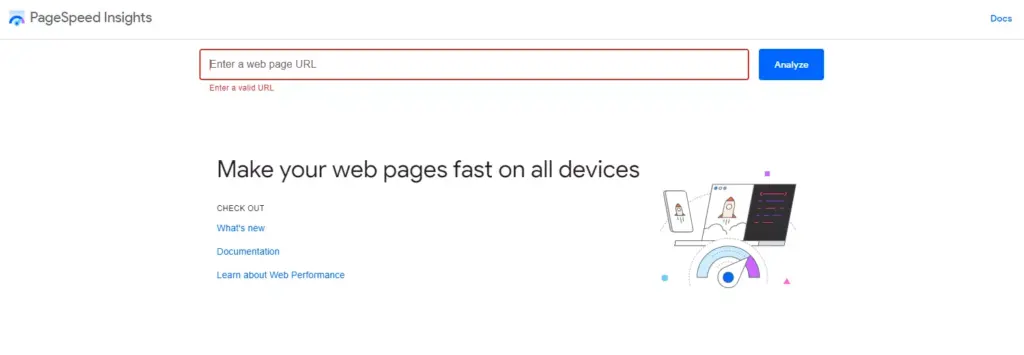
Google PageSpeed Insights is a free tool that analyzes the content of a web page and then generates suggestions to make that page faster. It provides both mobile and desktop views of your website’s performance, offering detailed recommendations for each issue, which can be incredibly helpful for developers. However, it’s worth noting that the tool can be a bit intimidating for beginners and non-developer users.
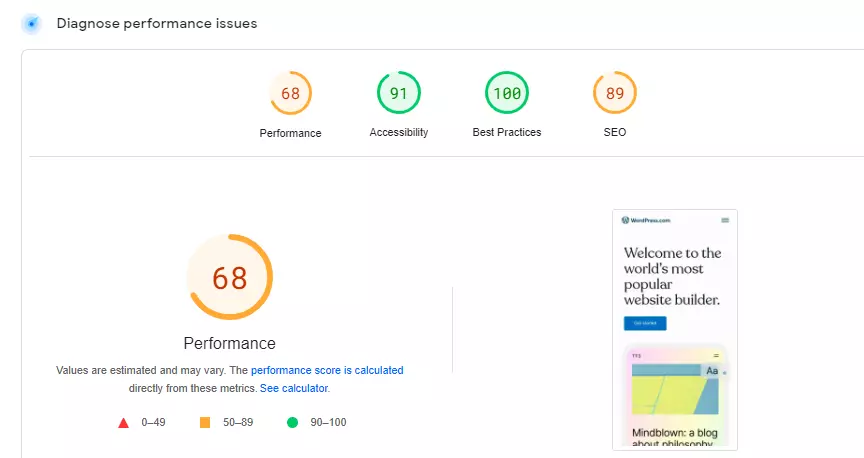
Google PageSpeed Insights evaluates various aspects of web page performance, including server response time, JavaScript execution time, and more. It also provides a score ranging from 0 to 100, with higher scores indicating better performance. This tool is particularly useful because it not only measures the speed of your site but also provides actionable recommendations on how to improve your site’s performance.
Here are some key features of Google PageSpeed Insights:
- Core Web Vitals: This feature provides data on key metrics like Largest Contentful Paint (LCP), First Input Delay (FID), and Cumulative Layout Shift (CLS). These metrics are crucial for understanding your site’s user experience.
- Performance Score: Google PageSpeed Insights provides a performance score between 0 and 100. A higher score indicates better performance.
- Lab Data: This feature provides information about how your page performs under controlled conditions. It’s useful for debugging performance issues.
- Field Data: This feature provides real-world user experience data, which is crucial for understanding how actual users interact with your site.
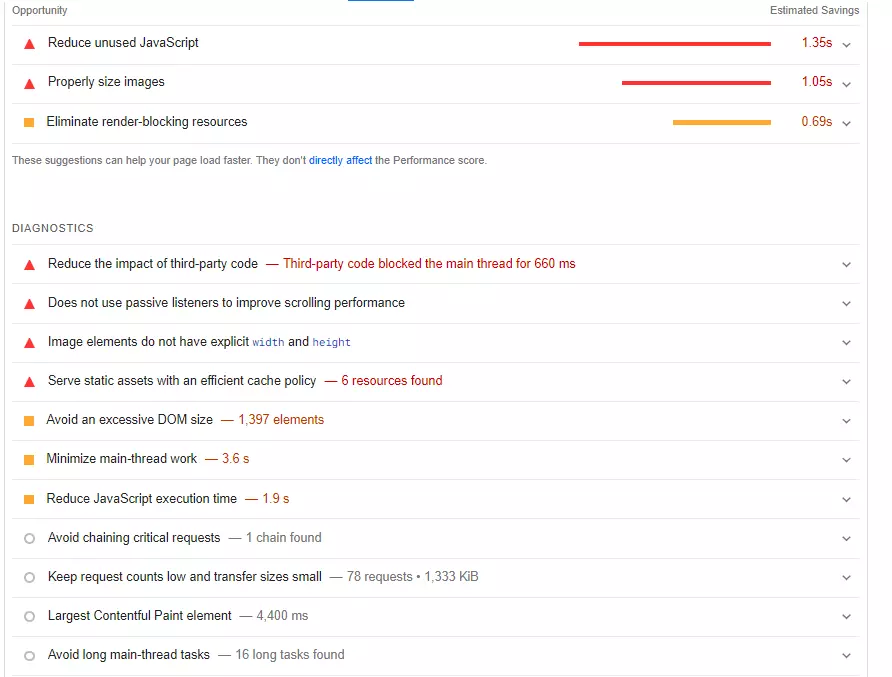
- Opportunities: Google PageSpeed Insights provides suggestions on how to improve your site’s performance. These suggestions are based on the analysis of your site’s content and user data.
- Diagnostics: This feature provides additional information about the performance of your page, including details about each metric.
- Passed Audits: This feature shows the audits that your page passed successfully, indicating the areas where your site performs well.
How to Use Google PageSpeed Insights
Using Google PageSpeed Insights is straightforward. Here’s a step-by-step guide:
- Step 1: Visit the Google PageSpeed Insights website.
- Step 2: Enter your website URL in the provided field.
- Step 3: Click on the ‘Analyze’ button. The tool will then analyze your website and provide a detailed report.

- Step 4: Review the report. Pay close attention to the Performance Score and the Core Web Vitals. These metrics provide a snapshot of your site’s performance.

- Step 5: Scroll down to the ‘Opportunities’ and ‘Diagnostics’ sections. These sections provide actionable insights on how to improve your site’s speed.

- Step 6: Implement the suggested changes. Remember, improving your site’s speed is a continuous process. Regularly test your site’s speed and make necessary adjustments to ensure optimal website performance.

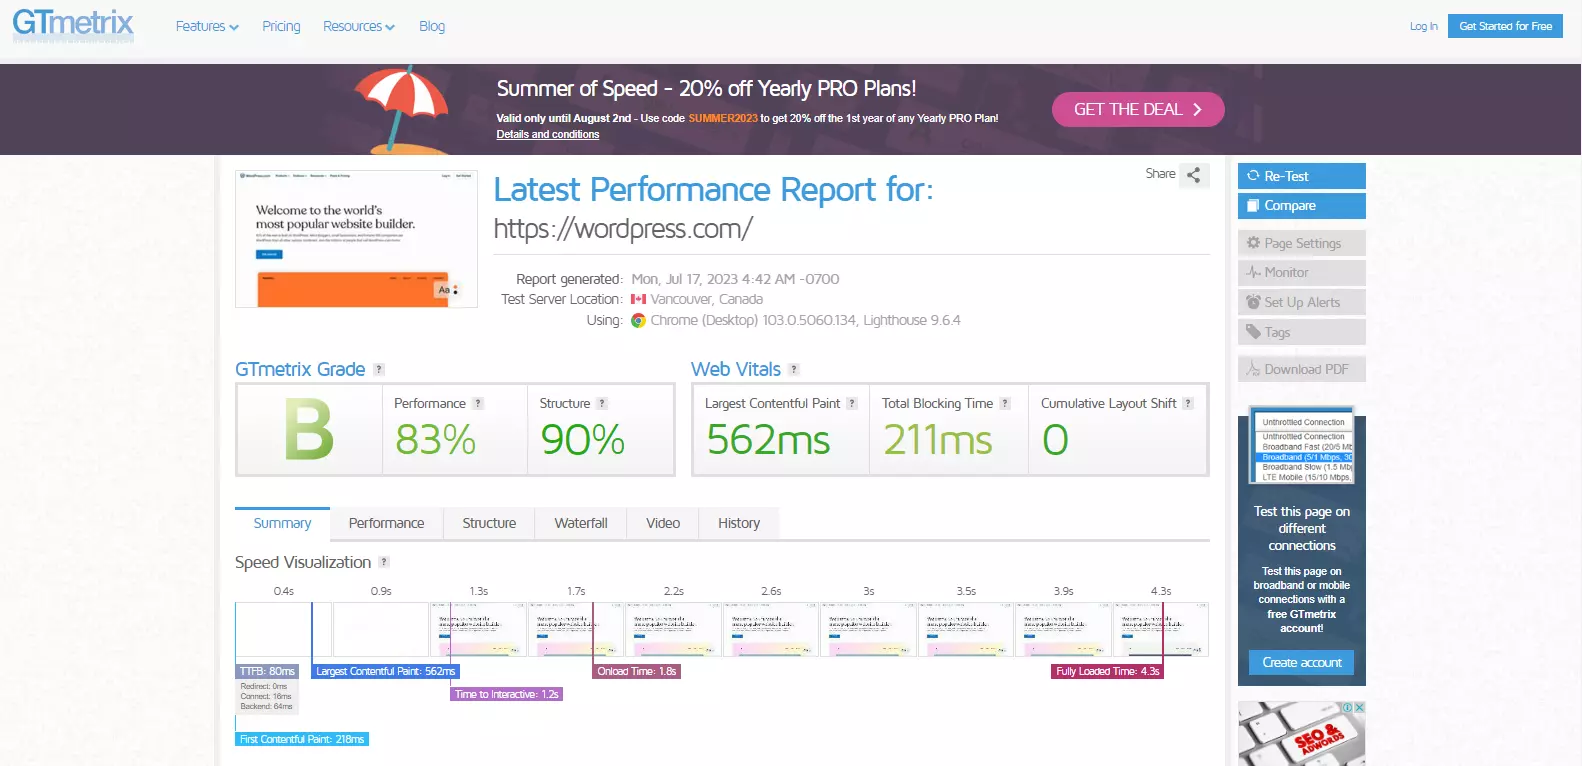
GTmetrix
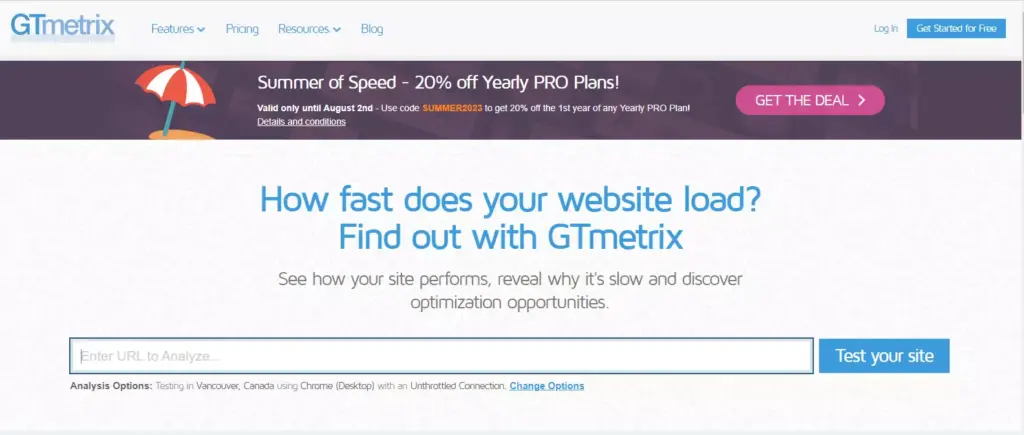
GTmetrix is one of the best names that often pops up among the best WordPress speed test tools. GTmetrix is a free tool that analyzes your website’s speed performance using Google Page Speed and YSlow. It provides actionable recommendations on how to optimize your website and improve its loading speed.
GTmetrix offers a comprehensive suite of features that make it a go-to tool for many website owners. Here are some key features that make GTmetrix stand out:
- PageSpeed and YSlow Scores: GTmetrix provides scores for your pages based on their performance relative to a set of rules. These scores give you a quick understanding of how well your site is performing.
- Page Load Details (Time, Size, Requests): You get detailed information about your page load, including the total time, total size, and the number of requests.
- Waterfall, Video, and Report History: GTmetrix provides a visual representation of how your site loads and identifies where bottlenecks occur. You can even record your page loads and pinpoint exactly where hang-ups happen.
- Performance and Structure Audits: GTmetrix conducts audits for performance and structure, providing you with actionable advice to make your site faster.
- Different Test Server Regions: GTmetrix has test servers in Canada, the U.S., the U.K., Australia, India, Brazil, and more, allowing you to see how your site performs in different regions.
- Simulated Devices: GTmetrix can simulate your website on a variety of devices, including desktops and mobile devices, to give you an idea of how your site performs across different platforms.
- Advanced Testing Options: You can test with a logged-in user, test with adblocker, capture Lighthouse report, and more.
How to Use GTmetrix
Using GTmetrix to test your WordPress site’s speed is a straightforward process. Here’s a step-by-step guide on how to do it:
- Step 1: Visit the GTmetrix website.
- Step 2: Enter your website URL in the ‘Test your site’ field.
- Step 3: Click on ‘Test your site’. GTmetrix will now analyze your website. This process may take a few minutes.

- Step 4: Once the analysis is complete, you’ll be presented with a detailed report. This report includes your PageSpeed Score, YSlow Score, fully loaded time, total page size, and requests.
- Step 5: For more detailed insights, scroll down to view the waterfall breakdown, video, and history.
- Step 6: To get a more detailed report, you can sign up for a free GTmetrix account. This will allow you to test from different regions, use different browsers, and even simulate a device.
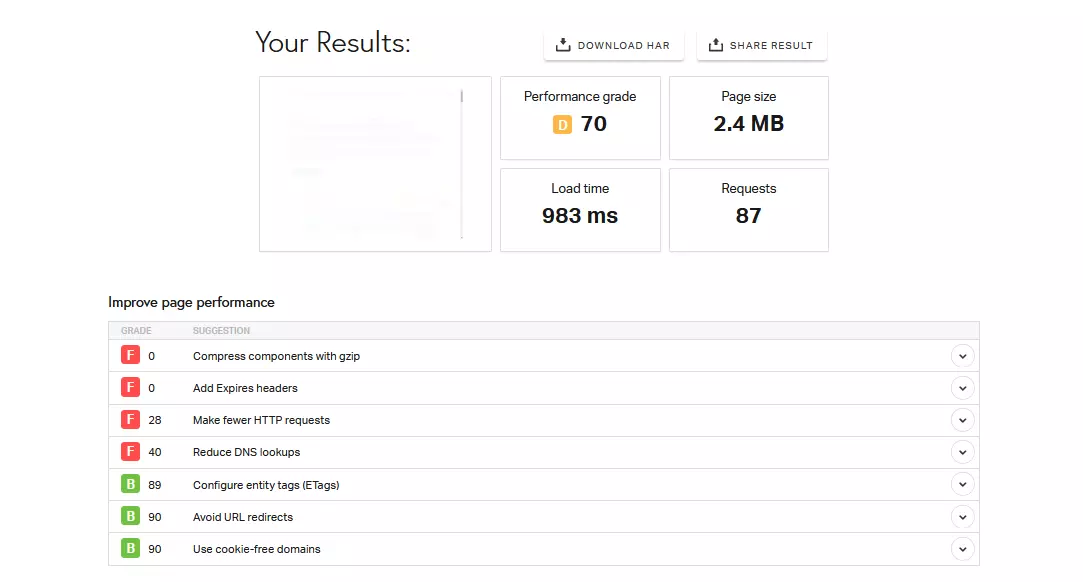
Pingdom Tools

Pingdom Tools is another popular speed testing tool. This tool is designed to help you be the first to know when your site is down. It tests the availability of your crucial websites, applications, and services as often as every minute with its network of 100+ servers worldwide.
Pingdom Tools is more than just a website availability checker. It alerts you about error messages, HTTP status, content changes, and more. When your website becomes available again, the system notifies you that all is well. This feature is part of Pingdom’s uptime monitoring.
Key Features of Pingdom Tools
- User Experience Monitoring From Real Visitor Data: Pingdom Tools optimizes your website’s performance based on data from actual site visitors with Real User Monitoring (RUM). It helps you troubleshoot performance issues from the end-user’s perspective and identify bottlenecks with advanced filtering.
- Rich Performance Data: Each test loads your complete webpage, including HTML, CSS, scripts, and images, giving you rich performance data.
- Analyze in Real Time: Understand user behavior based on their browser, platform, and country in real time or historically from a selected time range.
- Page Speed Monitoring: Pingdom Tools helps you analyze the load speed of your web pages and shows you how to make them faster. It identifies which elements of your webpage are fast, slow, or too big; which best practices you’re not following; and whether the changes you’ve made have had the intended effect.
- Identify Broken and Slow Website Interactions: The synthetic monitoring feature in Pingdom includes transaction monitoring. Transaction tests simulate site interactions by reproducing them at set intervals in a real Chrome browser as if a visitor was experiencing them.
- Immediate and Reliable Alerting: Pingdom was made to directly alert users of any downtime occurring on their servers and websites. You can select when you wish to be alerted about an outage.
How to Use Pingdom Tools
- Visit Pingdom: Visit the Pingdom Tools official website.
- Enter Your Website URL: Enter the URL of the website you want to test in the provided field.
- Choose a Test Server Location: Select the location from which you want to run the test. This should ideally be where most of your website’s traffic comes from.

- Start the Test: Click on the “Start Test” button. Pingdom Tools will then analyze your website and provide a detailed report.
- Analyze the Report: The report will include various metrics such as load time, page size, and the number of requests. It will also provide performance insights and recommendations for improvement.


WebPageTest.org
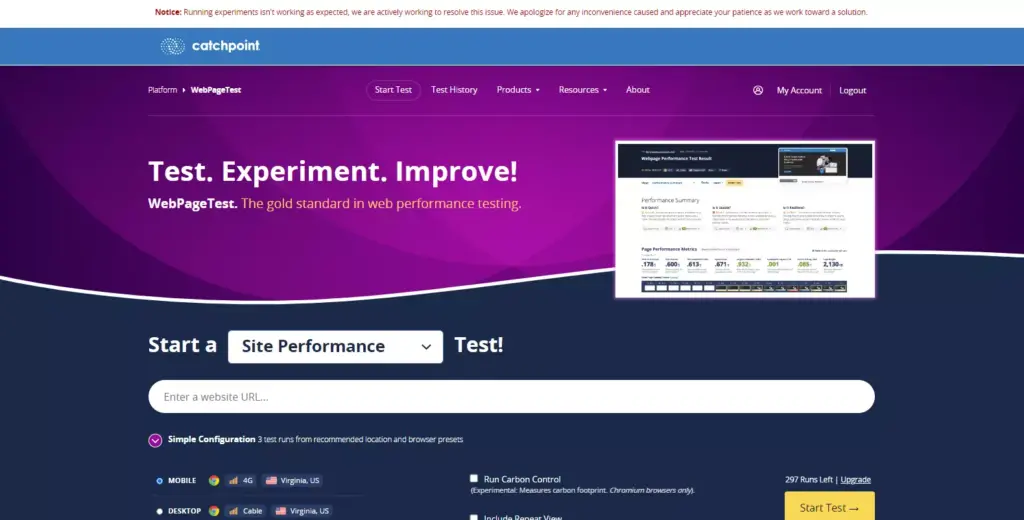
WebPageTest.org is a comprehensive website speed test tool. This free, open-source tool is designed to provide in-depth insights into your website’s performance, making it a favorite among developers and website owners alike.
WebPageTest.org offers a multitude of features that make it a versatile tool for anyone looking to optimize their website’s speed. Here are some of its standout features:
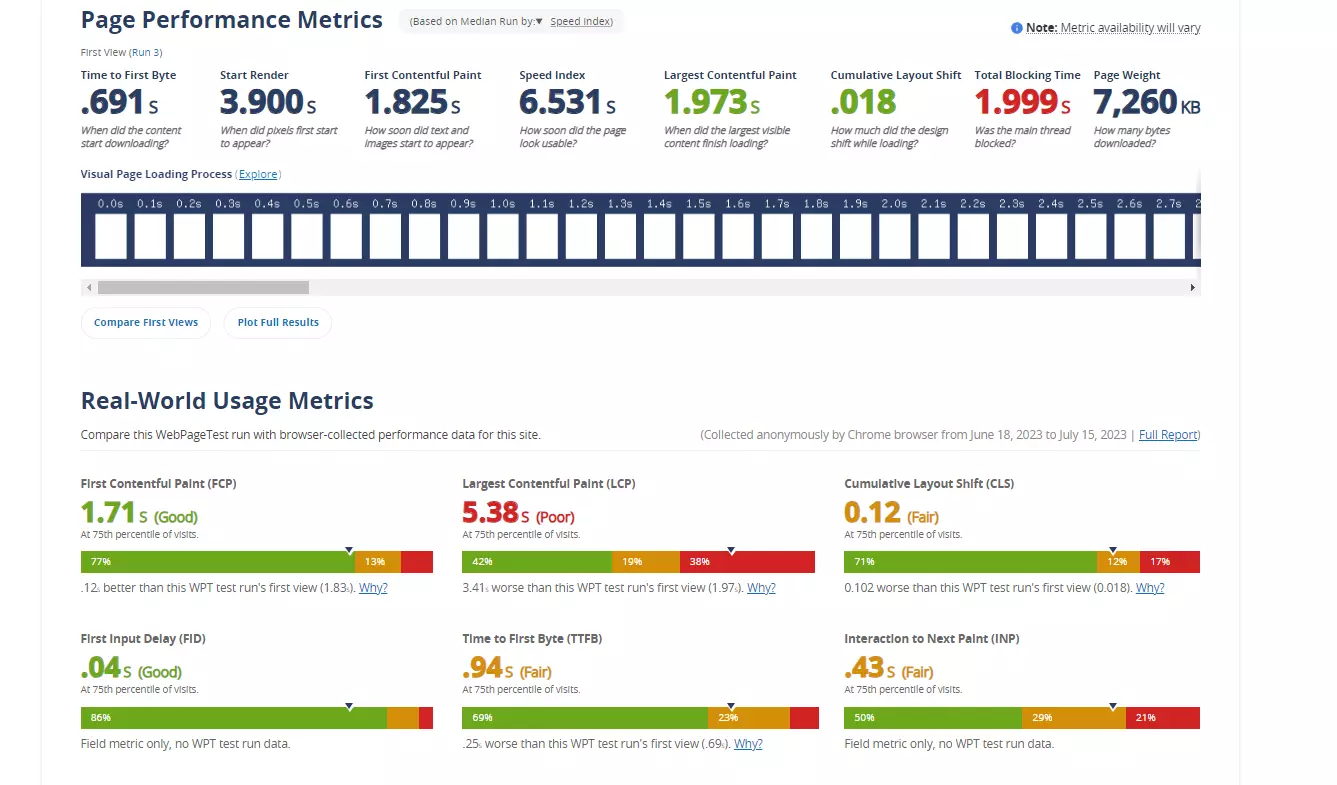
- Detailed Performance Reports: WebPageTest.org provides a comprehensive report of your website’s performance, including load time, first byte time, and start render time. It also provides a visual representation of your website’s loading process, making it easier to identify bottlenecks.
- Multiple Test Locations and Browsers: With WebPageTest.org, you can test your website’s speed from multiple locations worldwide and across various browsers. This feature is crucial for websites with a global audience.
- Advanced Testing: WebPageTest.org allows you to conduct advanced testing, including multi-step transactions, video capture, content blocking, and much more.
- Performance Review and Grades: The tool provides a performance review and grades your website on different parameters like caching, compress transfer, first byte time, etc.
- Custom Settings: WebPageTest.org lets you customize test settings, including the number of tests to run, the connection speed, and more.
- Waterfall View and Connection View: These views provide a visual representation of your website’s load time and the connection used during the test.
- Content Breakdown: This feature provides a detailed breakdown of your website’s content, helping you identify what’s slowing down your site.
How to Use WebPageTest.org
Using WebPageTest.org to test your WordPress website’s speed is straightforward. Here’s a step-by-step guide:
- Visit the Website: Go to WebPageTest.org.
- Enter Your Website URL: In the ‘Enter URL to Test’ field, input the URL of the website you want to test.
- Choose Test Location and Browser: Select your desired test location and browser from the respective dropdown menus.
- Advanced Settings: If you want to customize your test, click on the ‘Advanced Settings’ dropdown and adjust as needed.
- Start the Test: Click on ‘Start Test’. The tool will now test your website’s speed and provide a detailed report once the test is complete.
- Analyze the Results: Once the test is complete, you’ll be presented with a detailed report. Take the time to go through the report and identify areas where your website’s performance can be improved.

YSlow

YSlow is a free tool that analyzes web pages and provides insights into why they might be slow. It’s based on Yahoo!’s rules for high-performance websites, making it a reliable choice for your WordPress speed test arsenal. This tool is not just about identifying problems; it’s about providing actionable solutions.
YSlow grades your web page based on one of three predefined rulesets or a user-defined ruleset. It offers suggestions for improving the page’s performance, summarizes the page’s components, and provides tools for performance analysis, including Smush.it™ and JSLint.
Here are some of the key features of YSlow:
- Grading Web Pages: YSlow grades your web page based on one of three predefined rulesets or a user-defined ruleset. This grading system helps you understand where your website stands in terms of performance.
- Performance Suggestions: YSlow offers suggestions for improving the page’s performance. It’s like having a web performance expert guiding you on how to optimize your website.
- Component Summary: YSlow summarizes the page’s components, providing a detailed breakdown of all the elements on your page.
- Performance Statistics: YSlow displays statistics about the page, giving you a numerical understanding of your website’s performance.
- Performance Analysis Tools: YSlow provides tools for performance analysis, including Smush.it™ for image optimization and JSLint for JavaScript code quality analysis.
Note:
The downloading sources for Yslow are not currently available. For more details, click here.
New Relic
New Relic is a powerful monitoring tool designed to help you with its full-stack observability features. It allows you to bring in data from any digital source, providing a comprehensive understanding of your system. This tool is designed to analyze data efficiently, enabling you to respond to incidents before they become problems.
New Relic offers a wide range of features that help you monitor, debug, and improve your entire stack. Some of its key features include:
- Application Performance Monitoring (APM): New Relic supports apps for several programming languages, including C, Go, Java, .NET, Node.js, PHP, Python, and Ruby. It helps you understand your web or non-web application’s performance.
- Infrastructure Monitoring: This feature allows you to monitor infrastructure like databases and servers, providing a comprehensive view of your system’s health.
- Log Management: New Relic can manage large amounts of logs, making it easier for you to analyze and understand your data.
- Mobile Monitoring: This feature allows you to monitor the performance of all your mobile apps from one platform.
- Network Monitoring: New Relic provides insights into your network performance, helping you identify and resolve issues quickly.
- Synthetic Monitoring: This feature allows you to simulate user interactions with your application, helping you identify potential issues before they affect your users.
- Alerts and Applied Intelligence: New Relic allows you to set up alerts and uses artificial intelligence to analyze your data and provide actionable insights.
- Change Tracking: This feature helps you track changes in your system, making it easier to identify potential issues and their causes.
- Distributed Tracing: This feature provides a detailed view of how requests travel through your system, helping you identify bottlenecks and improve performance.
- Service Level Management: New Relic allows you to track and manage your service levels, ensuring that you meet your performance goals.
New Relic’s capabilities are extensive, but getting started with the platform is a straightforward three-step procedure.
How to Use New Relic
Here’s a step-by-step guide on how to use New Relic effectively:
Step 1: Sign up for New Relic if you haven’t already. The platform offers a generous free tier, with 100GB of data and one user free forever, and no credit card is required.
Step 2: Ingest some data. New Relic’s guided install auto-discovers your environment and walks you through a recommended setup. When the infrastructure agent and APM agent are installed, log data is usually also reported.
Step 3: Check out some dashboards. Once you’ve got some data coming in, it’s time to explore your environment in real-time with some out-of-the-box UI views. You should see data in the Infrastructure, APM, and Logs UI pages.
Step 4: Add more data. If you need data from other sources, choose from New Relic’s hundreds of integrations.
Step 5: Set up alerts. New Relic allows you to set up notifications for issues, ensuring you’re always aware of potential problems.
Step 6: Add users. Once you’re set up with New Relic, you can add the rest of your team to the platform. Use the User Management UI to add users.
UpTrends

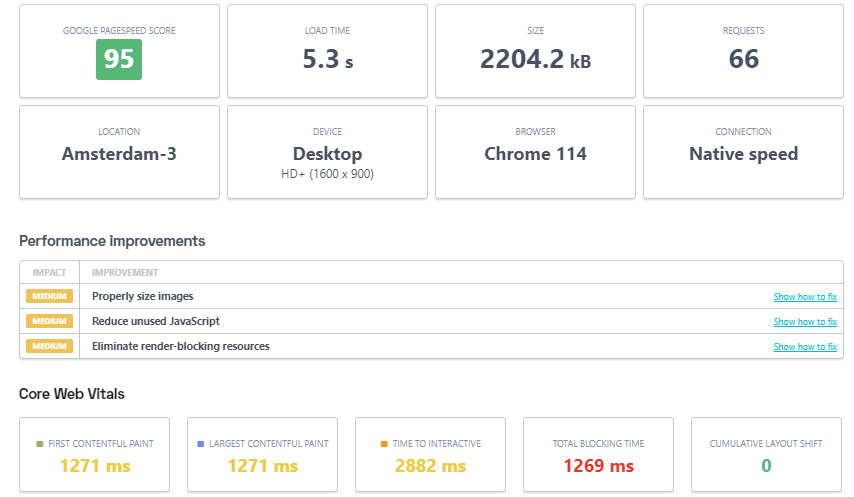
UpTrends is a robust speed testing tool that provides a snapshot of how your desktop or mobile users experience your webpage. It’s designed to give you everything you need to make smart, performance-related decisions about your website and its content. With UpTrends, you can inspect your Google PageSpeed Insights score, recommended improvements, important page metrics, and page-load progression waterfall report.
Here are some of the key features of UpTrends:
- Core Web Vitals and W3C Timing Metrics: UpTrends provides detailed insights into when your webpage has performed important load events such as First Contentful Paint (FCP) or Time to First Byte (TTFB).
- Filmstrip Feature: This feature takes screenshots while the page is loading, providing a visual timeline of how long it takes for your page to fully load.
- Detailed Analysis: UpTrends allows you to see exactly what slows down your website and provides actionable tips for improvement.
- Element Analysis: With the website speed check, you can see the quantity and size of your page elements, the allocation of images, script files, CSS files, HTML files, and the domains the elements come from.
- Worldwide Testing: The free website speed check lets you choose from 10 worldwide locations (sign up and get access to 233 checkpoints), allowing you to test your website’s performance from the same places and over the same Internet infrastructure your visitors use daily.
- Mobile Website Speed Test: UpTrends allows you to test your mobile website speed, which is crucial as Google ranks your page on its mobile speed.
- Simulate Less-Ideal Bandwidths: This feature allows you to throttle your test’s connection speed, giving you a better representation of your site’s performance across different network connections.
How to Use UpTrends
Here’s a step-by-step guide on how to use UpTrends effectively:
Step 1: Sign up for UpTrends. They offer a free 30-day trial.
Step 2: Choose a browser of your choice: Chrome or Edge. As your page loads, the tool tracks every detail along the way.
Step 3: Analyze every single element. The waterfall report gives you the URL, the load progression, the request and response headers, and the connection details for each element.
Step 4: Compare page speed from Google Chrome and Edge.
Step 5: Check your website speed from locations worldwide. You can spot latency problems affecting your users and fix them.
Step 6: Optimize with Google PageSpeed Insights. The speed test tool gives you optimization suggestions you need to focus your efforts and get the best results.
Yellow Lab Tools
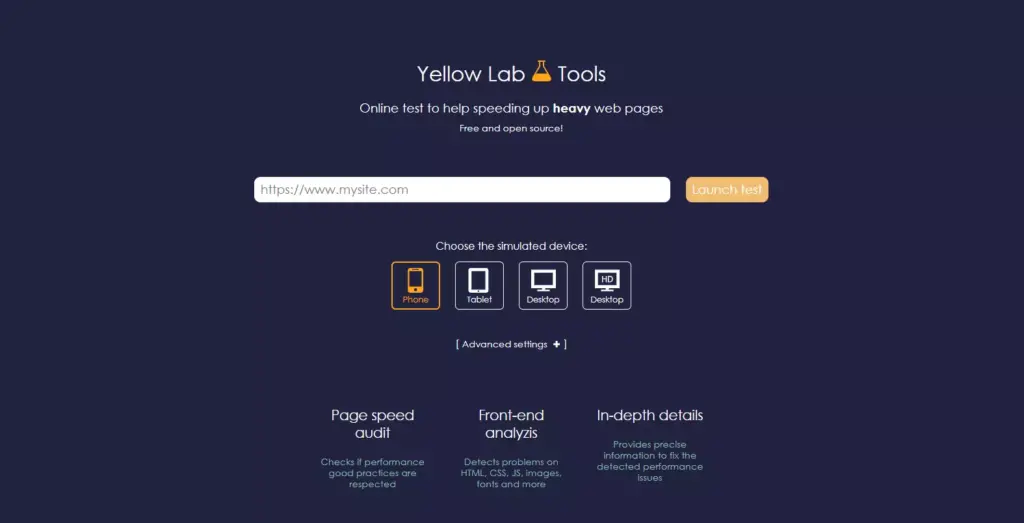
Yellow Lab Tools is a robust and user-friendly WordPress speed test tool that comprehensively analyzes your website’s performance. It’s a free, open-source platform that allows you to test your website’s speed, offering a detailed report that can help you optimize your WordPress site’s performance.

Yellow Lab Tools is known for its in-depth analysis, covering several website performance areas. Some of its key features include:
- JavaScript Analysis: Yellow Lab Tools provides a detailed analysis of your JavaScript, including the number of JavaScript interactions and the amount of memory used by JavaScript.
- CSS Analysis: The tool provides an in-depth look at your CSS, including the number of CSS rules and the complexity of your CSS selectors.
- DOM Analysis: Yellow Lab Tools analyzes your DOM (Document Object Model), providing information on the number of DOM elements and the depth of your DOM tree.
- Server Configuration Analysis: The tool checks your server configuration, including HTTP headers and cookie sizes.
- Page Weight Analysis: Yellow Lab Tools provides a breakdown of your page weight, including the size of your HTML, CSS, JavaScript, and images.
- Responsive Web Design Analysis: The tool checks if your website is responsive, providing a score based on your use of media queries and viewport settings.
- Performance Best Practices: Yellow Lab Tools checks your website against a list of performance best practices, providing a score based on your adherence to these practices.
- Web Page Test: Yellow Lab Tools integrates with WebPageTest, allowing you to run a speed test on your website and view the results within Yellow Lab Tools.
Bottom Line
Website speed is a critical factor in the success of your WordPress site. It impacts user experience, SEO, and ultimately, your bottom line. By using the best WordPress speed test tools like Google PageSpeed Insights, GTmetrix, Pingdom Tools, WebPageTest.org, YSlow, New Relic, UpTrends, and Yellow Lab Tools, you can measure your site’s performance and identify areas for improvement.
Remember, optimizing your website speed isn’t a one-time task. It’s an ongoing process that involves regular testing and tweaking. But with the right tools and strategies, you can ensure your WordPress site loads quickly and performs at its best.
Finally, consider leveraging Host Duplex’s WordPress hosting services. Their high-performance hosting plans and top-notch customer service can significantly enhance your site speed and overall performance. So why wait? Start optimizing your WordPress site speed today for a better user experience and improved SEO rankings.


The 8 Best WordPress Speed Test Tools for Optimal Performance