
Are you running into the Forbidden 403 error when trying to access your WordPress site? This article will walk you through some of the most common fixes so your website can be back up and running as quickly as possible.
1. Modify file permissions
Each folder and file on your WordPress site’s server has its own unique file permissions that control who can read, write and execute them. An issue with the permissions on your WordPress site could be the cause for the 403 Forbidden error.
To view and modify your site’s file permissions, you’ll need to connect via FTP/SFTP. We will be using FileZilla for the steps below, but you can follow them using any FTP client.
Related: What is FileZilla? How do I use it to connect to my account?
According to the WordPress Codex, the ideal file permissions for WordPress are:
- Files – 644 or 640
- Directories – 755 or 750
- wp-config.php – 440 or 400
To set these permissions, follow the steps below:
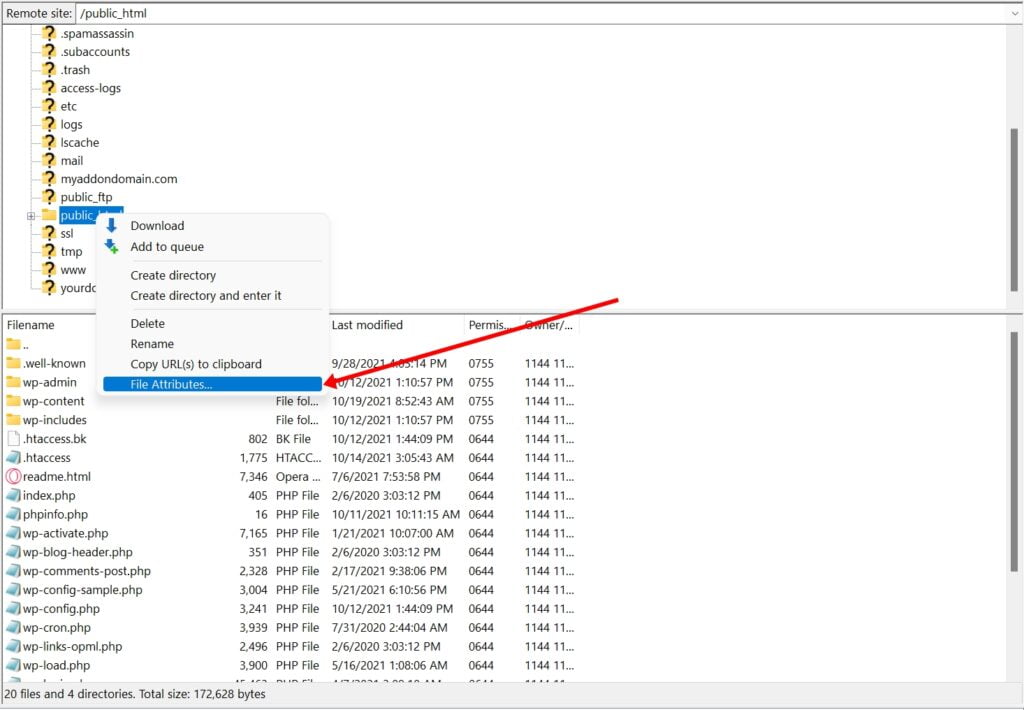
- Connect to your account using FileZilla
- Right click on your public_html folder, or the directory where your WordPress files are located
- Select File Attributes…
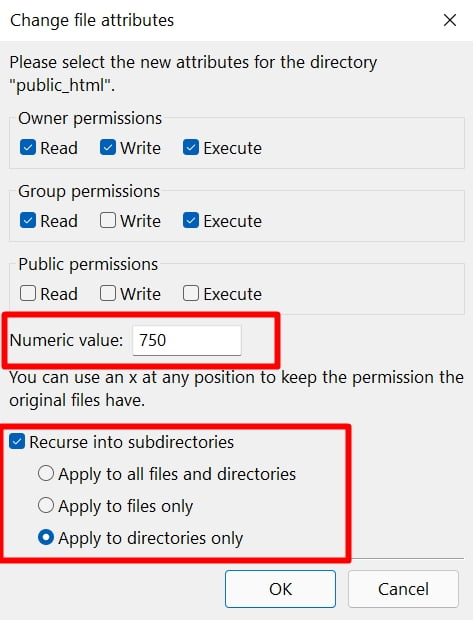
4. Enter a Numeric value of 750 or 755, and then check the option Recurse into subdirectories. Select Apply to directories only
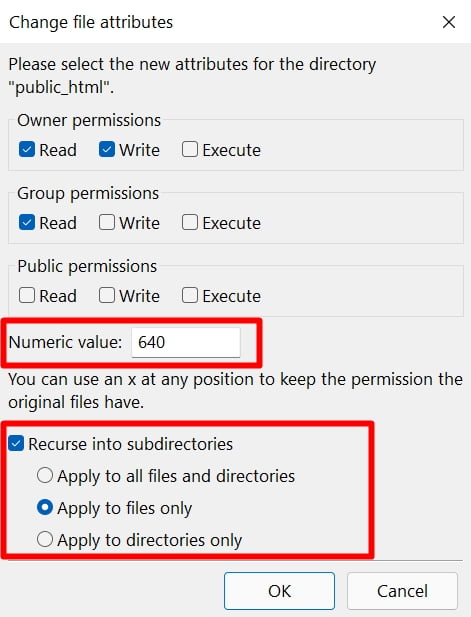
5. Repeat steps 2 and 3. Enter a Numeric value of 640 or 644. Check the option Recurse into subdirectories and select Apply to files only
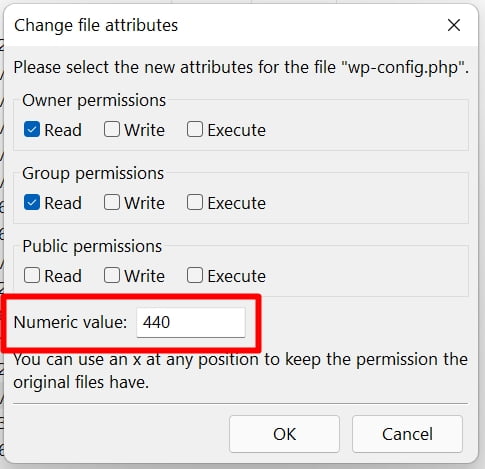
6. Right click on your wp-config.php file and select File permissions…
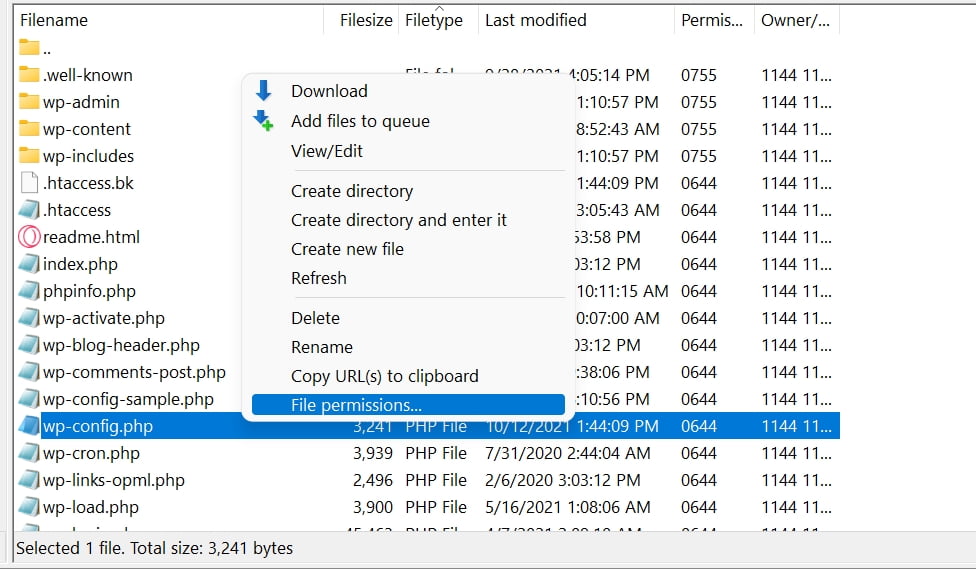
7. Enter a Numeric value of 440 or 400
If the error was caused by file permissions, you should now be able to see your WordPress website.
2. .htaccess File
There could be an issue with your .htaccess file.This is a basic configuration file used by the Apache web server. It is used to set up redirects, restrict access to all or some of your site, etc. The best solution in this case is to delete the existing .htaccess file and forcing WordPress to generate a clean one.
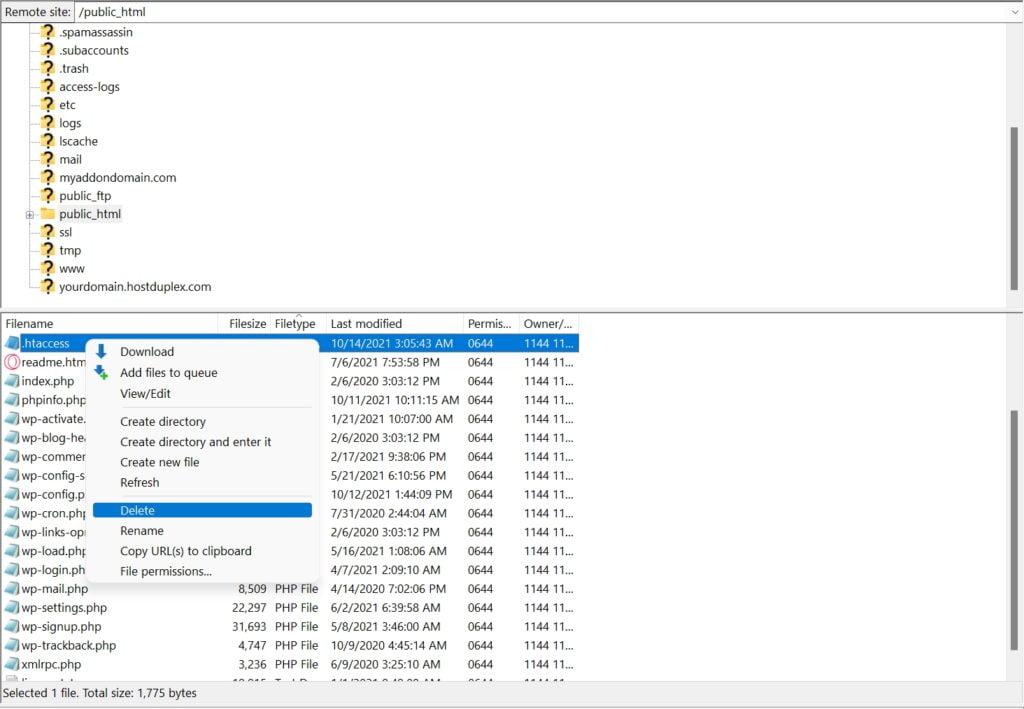
To delete the existing .htaccess file:
- Connect to your server via FTP
- Find the .htaccess file in your root folder
- Right click and click Download. It’s important to have a copy of the file as a backup
- Right click and select Delete
Refresh your WordPress site. If the .htaccess file was indeed the issue, you should not see the 403 Forbidden error anymore.
To force WordPress to generate a new .htaccess file:
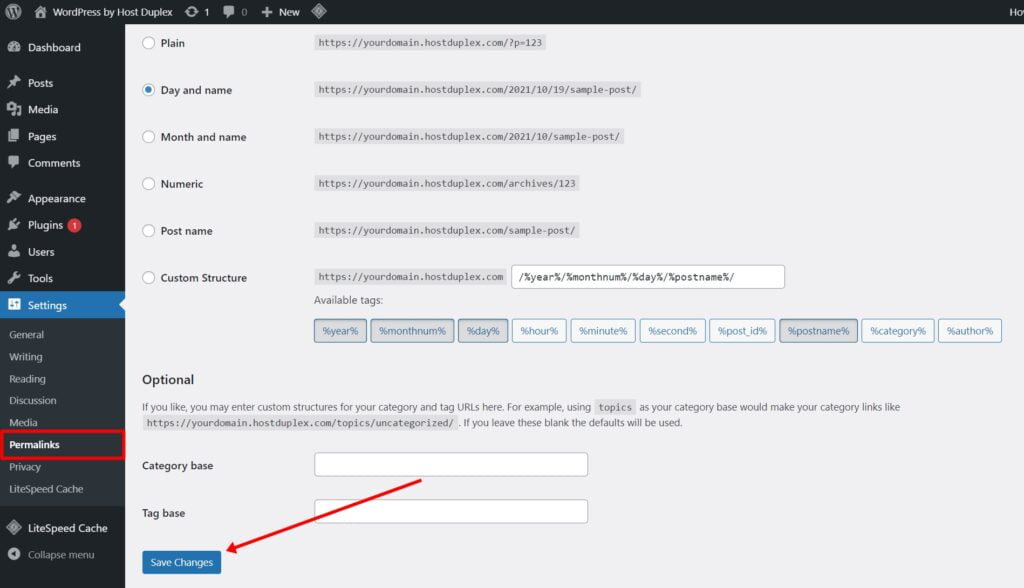
- Log in to your WordPress dashboard
- Go to Settings on your left sidebar, and then select Permalinks
- Now, you just need to scroll down and click on the Save Changes button at the bottom of the page. This will force WordPress to generate the new file
3. Deactivate and then reactivate Your Plugins
If you recently installed a plugin or a new theme on your WordPress, snippets of bad code could be the culprit here. A few ways you can troubleshoot this is by deactivating all your plugins or switching your theme. You won’t lose any data by doing this.
If you can still access your administrator dashboard, you can manage your plugins by navigating to the Plugins section using the left sidebar. You can begin by disabling the ones you suspect could be causing the problem and continuosly checking your website to see if it starts working.

If you can’t access your WordPress dashboard, try using FileZilla or another FTP client to connect to your server and rename your plugins folder. Then check your site again. If it works, then you will need to test each plugin one by one. Rename your plugin folder back to “plugins” and then rename each plugin folder inside of it, one by one, until you find the one that’s causing the issue.

For themes, go to Appearance –> Themes. There you can see the themes you have installed. Try switching the one you’re currently using on your website.

4. Deactivate CDN Temporarily
This error can also be caused by other services. If you’re using a CDN, you can try temporarily disabling it and checking your website again. There should be an option on your dashboard to do so, but the exact process will change depending on the provider you’re using.
If you can’t figure out how to or where the disabling settings are, you’ll need to contact your CDN provider or browse their knowledge base.
If you are a Host Duplex customer and still have questions, please open a ticket in the Host Duplex client portal.