Follow the steps below to create a phpinfo page using your cPanel File Manager. This process can also be done using an FTP program if you prefer.
1. Log in to your cPanel account
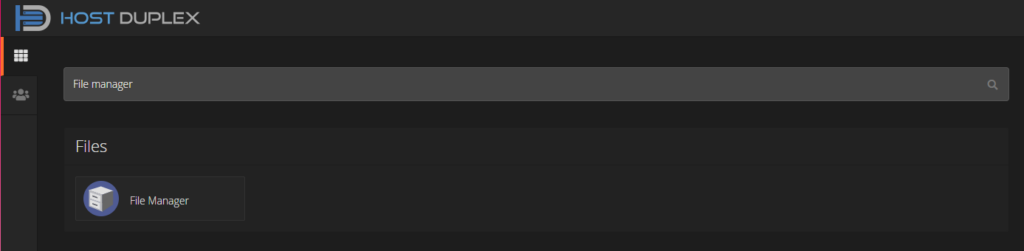
2. Open the File Manager. You can find it by scrolling down to the Files section or using the search bar
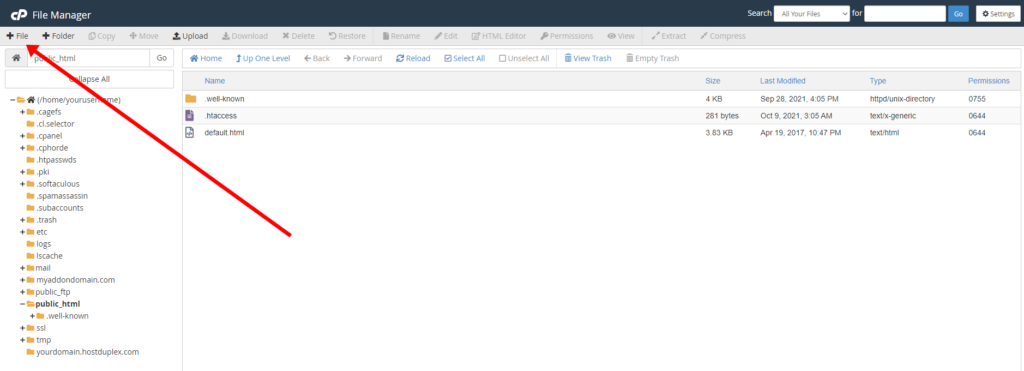
3. Navigate to the directory you are working with. For this example, we are viewing the PHP settings for our main domain, so we are navigating to the “public_html” folder
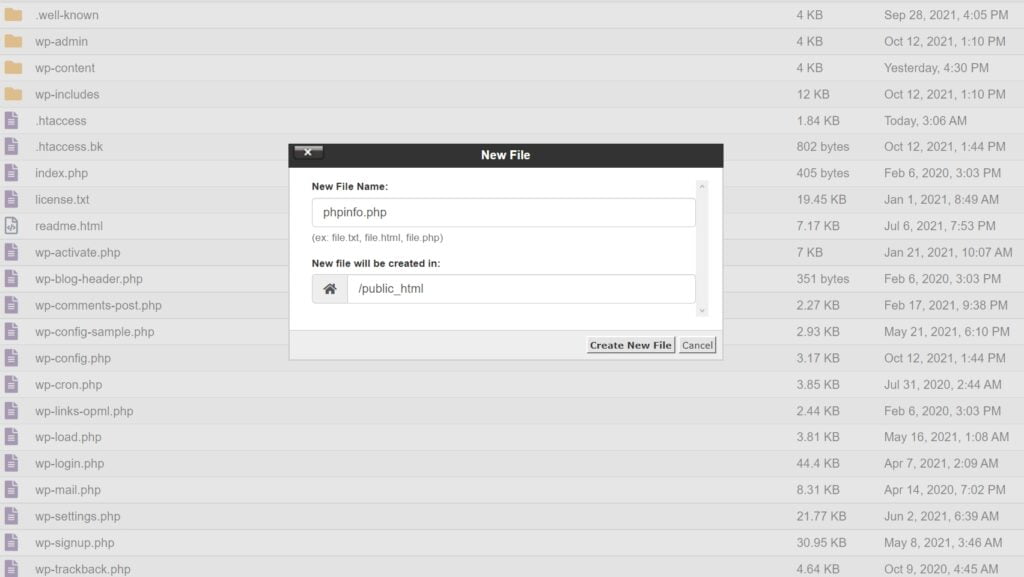
4. In the top menu, click +File option to create a new file
5. Create a name for your file and add .php at the end. phpinfo.php is a common name for the file. Click Create New File
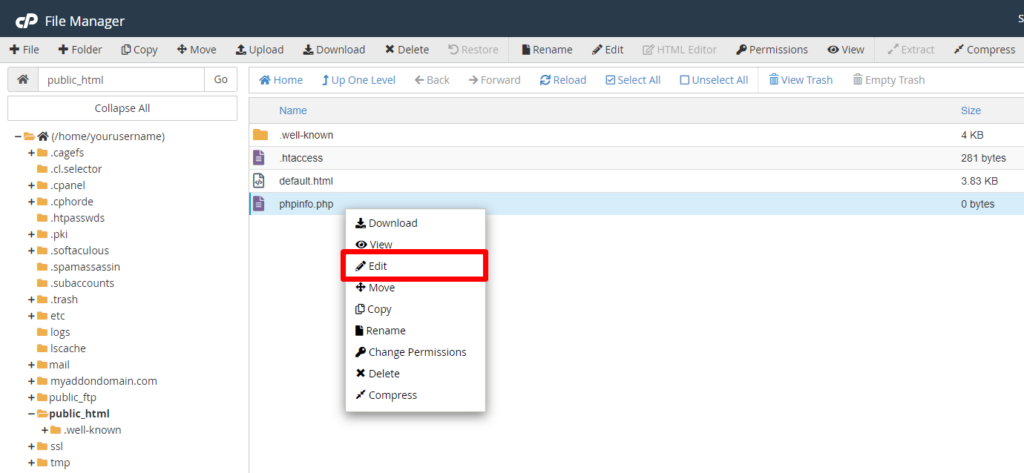
6. You should now be able to see the file on your directory. Right-click on it and choose Edit
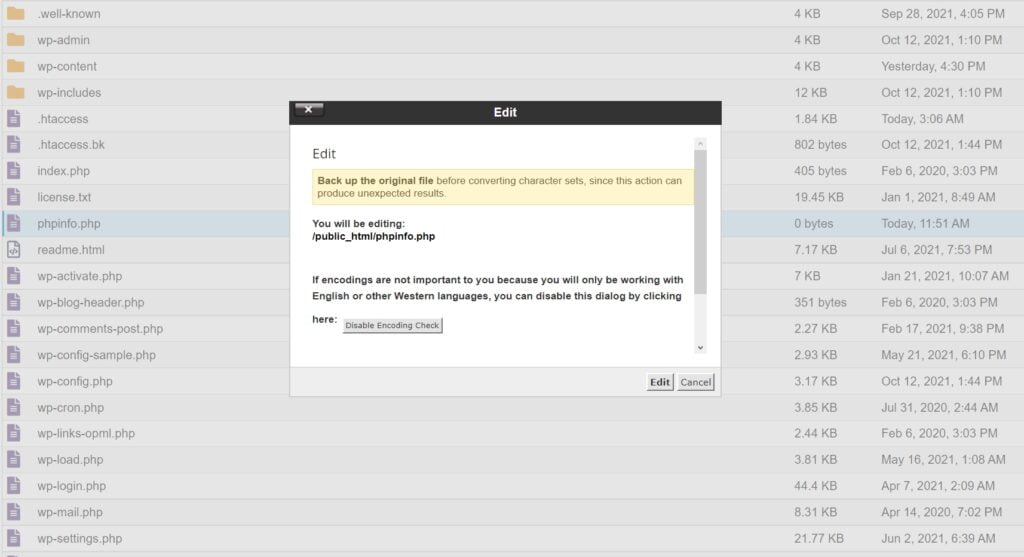
7. If you see a “Text Editor” window, choose “utf-8” from the drop-down list and then click Edit
8. Enter the following code into the .php file and click the Save Changes button on the top right
<? phpinfo(); ?>
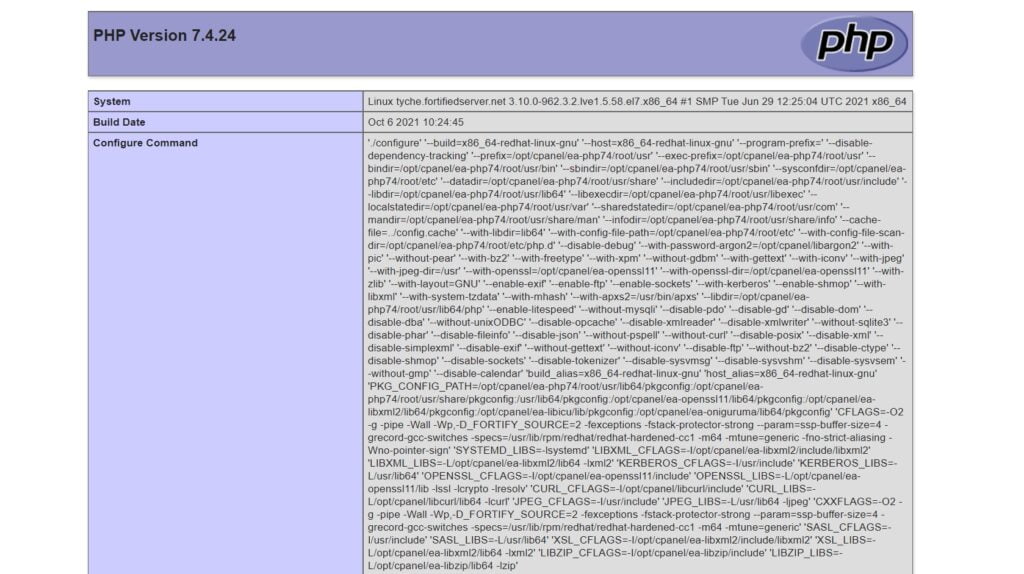
Great! You succesfully created a phpinfo page. If you created the file in your public_html folder, then you just need to add /phpinfo.php (If you used a different name for your file, replace phpinfo with it) at the end of your website’s URL in order to see it
yourdomain.com/phpinfo.php