
What Causes the “Server denied POP3 access for the given username and password” Error?
- POP Disabled: In some cases, it was seen that POP forwarding was disabled in the old account due to which the error was being triggered. It is important that POP forwarding is enabled in both the accounts in order for the feature to work properly.
- TFA Enabled: It is possible that two-factor authentication for the old account has been enabled due to which the issue is being triggered. Especially the users whose old account is hosted on the Zoho mail domain were facing problems due to TFA being enabled.
- Wrong Credentials: It is important that the full email address and the password are written correctly when the domain asks for the credentials to the old account. Some users were writing the username instead of the email due to which the issue was being triggered. Therefore, it is recommended that you enter the “Email Address” instead of the username to verify your credentials.
- POP Data Limit: In some cases, the email provider has a certain limit on the amount of data that can be forwarded to another email in one day. If the user exceeds that data limit, POP forwarding is temporarily disabled for that account.
How to fix it?
1. Force fetch emails to the destination account
- Sign out of the source email account completely and sign in to the Gmail destination account
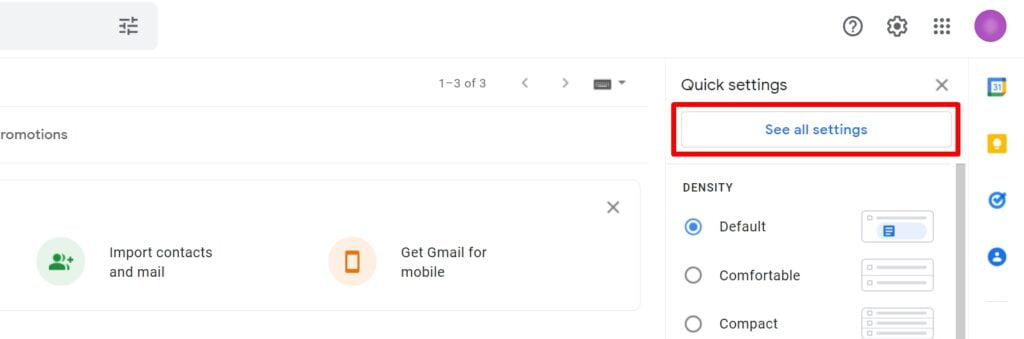
2. Click on the gear icon at the top right-hand area of your screen and click on See all settings. You will now be taken to the settings page

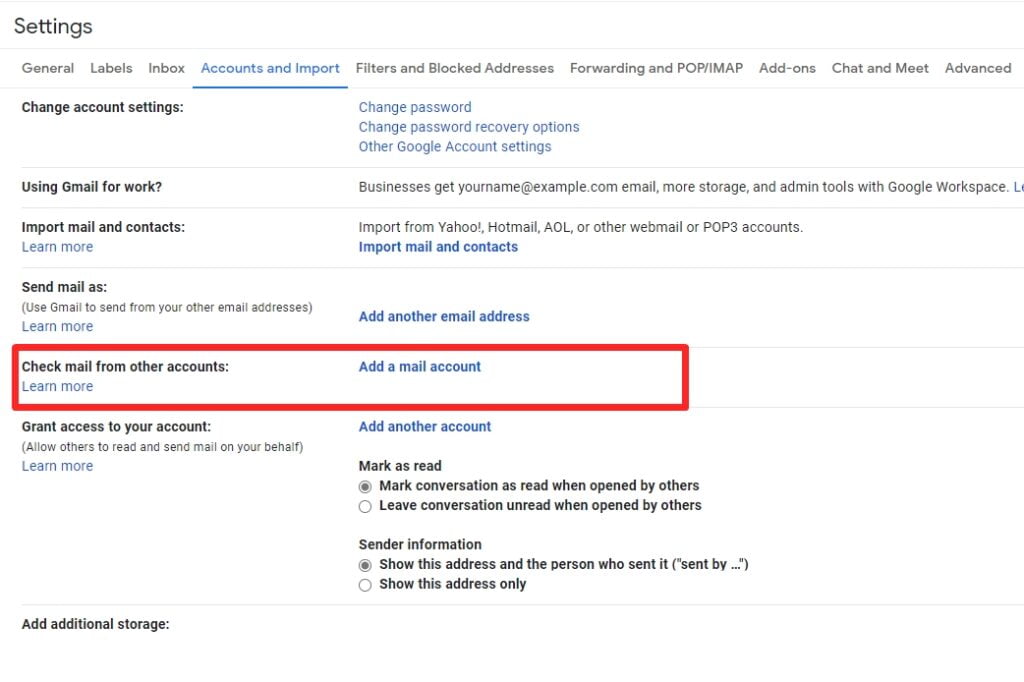
3. Here, navigate to the Accounts and Import tab

4. After that, go to Check mail from other accounts and hit Add a mail account. Clicking on Add a mail account triggers open a popup window
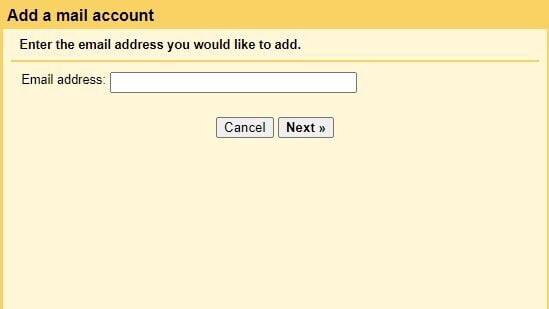
5. On this new window, type in the email address of the source account
6. Next, input your account password. Click on the Add Account button to proceed
7. After clicking on Add Account, if the server denied POP3 access for the given username and password message shows up, it means that the destination account is not trusted by the source account
8. Using the same web browser, sign out of the destination account and sign in to the source email account
9. Next, go to the Allow Access page and hit the Continue button. This action will help the source account trust the destination account by reducing its security for the next ten minutes
10. Now, log out of the source account and log in to the destination account. Next, click on Add Account like in step 7 above. This time around, the account will no longer return the POP3 Gmail error
2. Enable POP forwarding
It is important that POP forwarding for both the email accounts has been enabled before trying to transfer messages. Therefore, in this step, we will be enabling POP forwarding. For that:
1. Launch your browser and open a new tab.
2. Sign in to Gmail after entering your account’s credentials.
3. Click on the settings icon on the top right and then “See all settings”
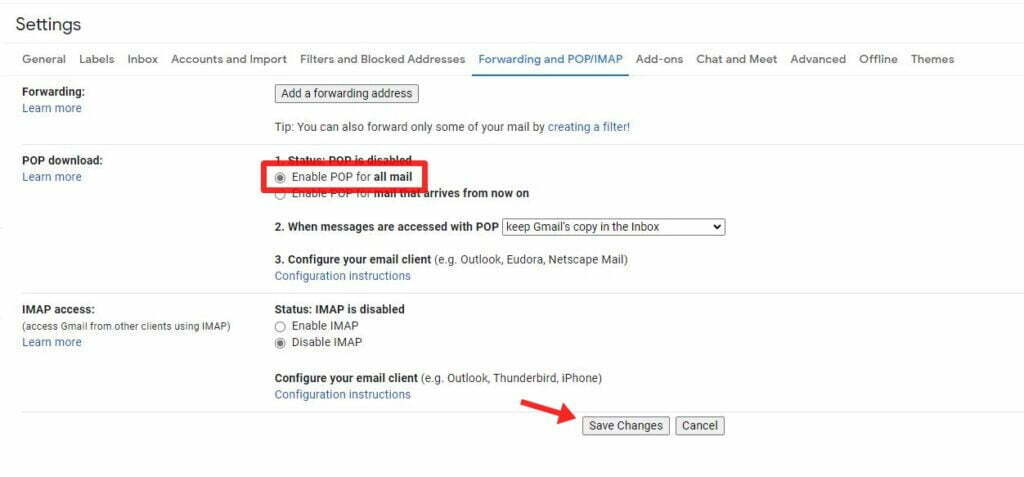
4. Click on the “Forwarding and POP/IMAP” tab

5. Check the “Enable POP for All Mail” or the “Enable POP for mail that arrives from now on” option depending upon your needs
6. Checking the “Enable POP for All Mail” option and save changes
7. Do this for both the accounts and check to see if the issue persists
3. Modify your password
If you’re completely sure that you’re using the correct email address (not username) and password, and none of the above solutions worked for you, then the issue may be caused by special characters within your password.
Some users have reported that changing their generated password to a simpler, alphanumeric one has successfully fixed this issue for them. In order to do so, you need to modify the email’s password from your host’s control panel.
If you use cPanel, follow this tutorial to change your email password.
I try this process but not sucessfull.
What error did you run into? I can try and help.